Madrid – An Unexpected Adventure

Madrid-Gran-Via

Okay, so here’s the backstory …

In October 2013 I was lucky enough to get cast in a commercial that was shooting in Madrid, Spain. (Oh, yea … I’m a professional actor, doing commercials, TV, film, etc.). Like it is with most castings, you find out you got the job just days before you are filming, so this sudden trip to Madrid was not something that had crossed my mind.

My first thought … where exactly is Madrid?

madrid-location-map

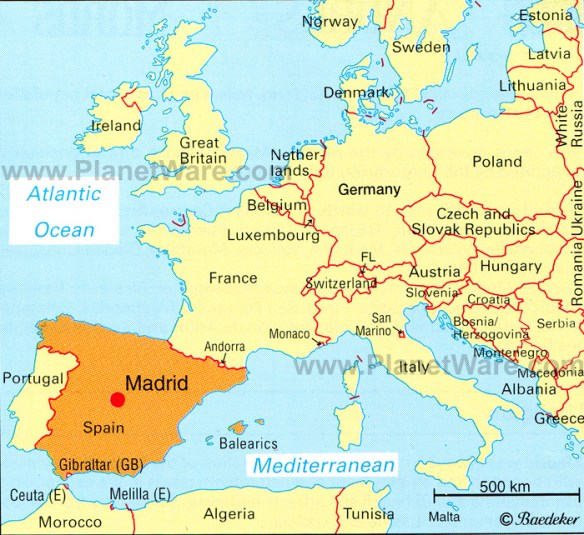
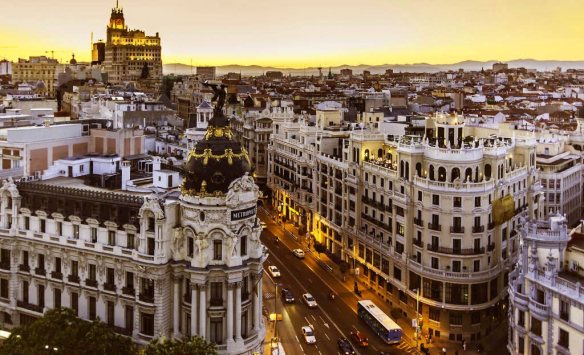
Madrid, as it turns out, is smack dab in the middle of Spain. I can’t think of another big city I’ve ever visited that didn’t have some kind of waterfront. I knew nothing of what to expect. I spent a few days feverishly scouring the internet to find out all I could before I was off to the city for a week.

20131021_140952

This is me when I have to get up at a very early hour to get a flight to Chicago, from where I will be getting a connecting flight to Madrid … 14 hours of travel, here I come!

20131021_180238

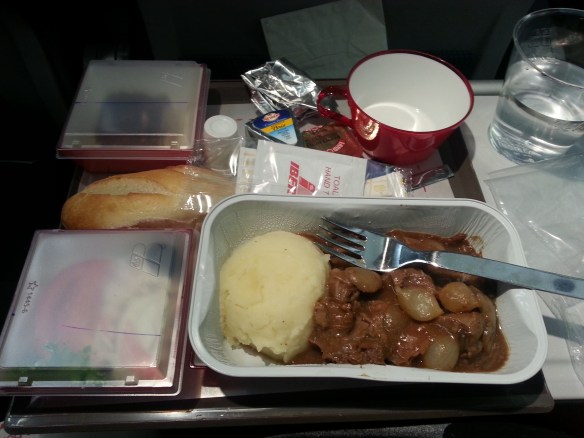
Hmm, the airplane food isn’t terrible … and I’m on the Spanish national airline … this bodes well for what I’ll find there

So, after 14 hours of travel (including a Home Alone style run through Chicago O’Hare airport to not miss my flight from Chicago to Madrid), I finally arrive

After a car picks me up from the airport and drops me at the hotel, it’s a quick shower and then they need me in wardrobe … the driver just waits for me to get ready

It’s about 10am, (though my body thinks it’s much later) and we’re driving through a city that looks pretty damn cool … maybe I’ll even get to see it?

After a couple of hours getting fitted for outfits I would wear on the day, I’m told that I won’t be needed again until Thursday morning. I ask what they need me to do.

“Have you seen The Prado Museum? You should go see that!”  With that advice, I’m given my per diem and sent on my way. It’s Monday, it’s about noon, and I am free to explore this city, one which I never really had given much thought to,  for 3 days.  My first decision, get lunch!

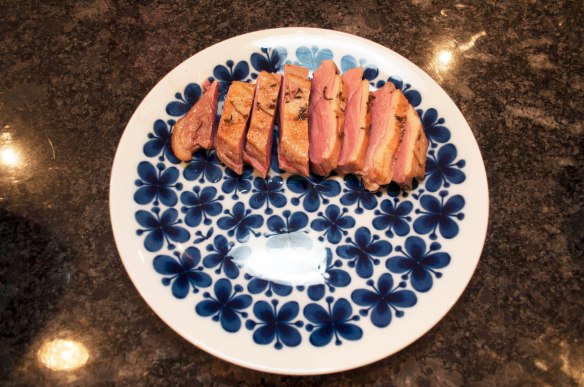
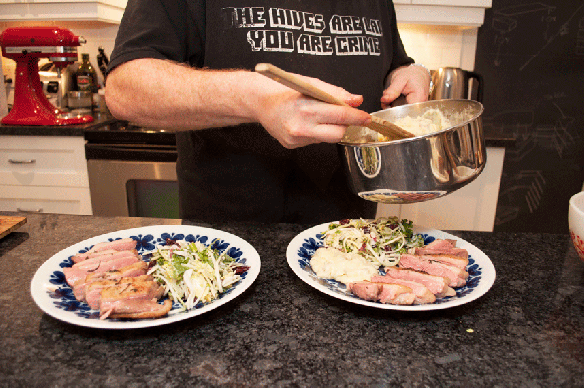
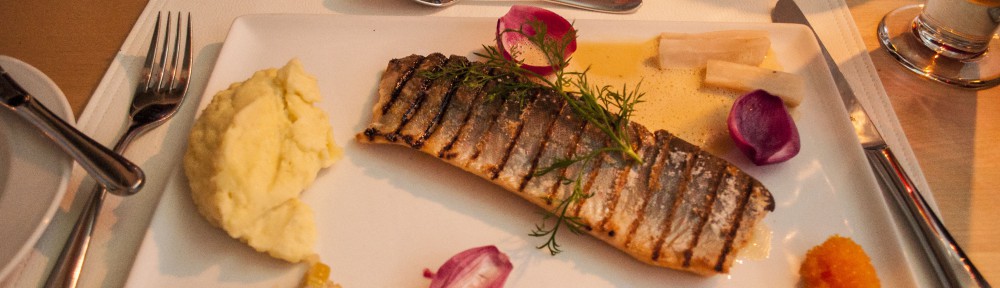
In most restaurants in Madrid, there is a Menu del Dia served during the day. It’s a fixed price meal of usually a soup, main course and dessert with a drink (note, as you can see above, my included ‘drink’ is a bottle of red wine and a bottle of sparkling water to mix it with … yes, a bottle of each!). At about 9 euros for the entire meal, this is definitely the best way to eat while in Spain!

Walking around the city I couldn’t get over how much it reminded me of Paris … with a touch of Rome. I often describe it as what would have happened if Paris and Rome had a child.

All this walking is making me want to stop at cafe (cafeteria in Spanish) and get a lovely pastry and coffee!

20131022_194606

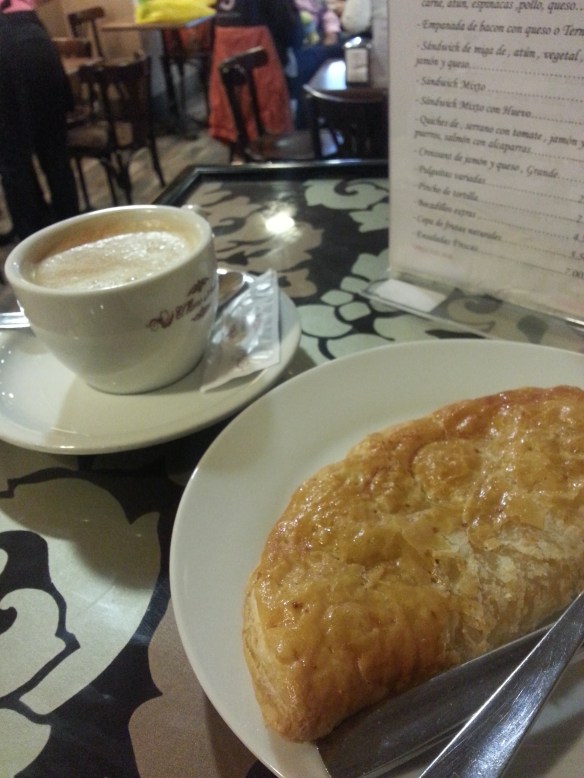
Yea, that’s more like it!

Okay, maybe I just get this out of the way with a mosaic off all my tasty coffee and snacks!

Do I know what all these things are called? Nope! I can tell you there’s a tuna pie, a dish that is basically cheese baked on bread and folded over … just good stuff

In the heart of the city is the stunning Retiro Park

Located nearby are the 3 big art galleries … the Prado, Thyssen and Reina Sofia

20131026_161055

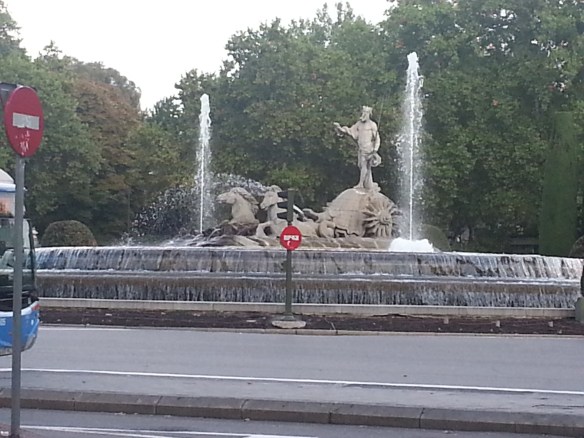
No pictures allowed inside … this is the amazing fountain across the street … of course, you didn’t think I wasn’t going to sneak pictures inside, right?

All that art was a bit overwhelming … time for a break

Beer and a lovely calamare bocadillo on a terrace … this will do!

In Madrid, everyone goes out for dinner all the time … after 10pm. The city really comes alive at night

Now, I wasn’t going to go to Madrid and not partake in some amazing paella. First, I had to find the right restaurant …

20131022_203433

Yea, any place with a front window like this … I’m gonna try it

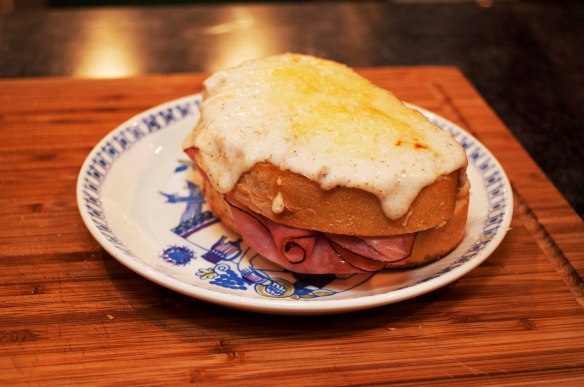
Served table side, with chicken, chorizo, saffron …  yes, this was amazing. Don’t worry, next post I’m going to show you how to do a paella at home!

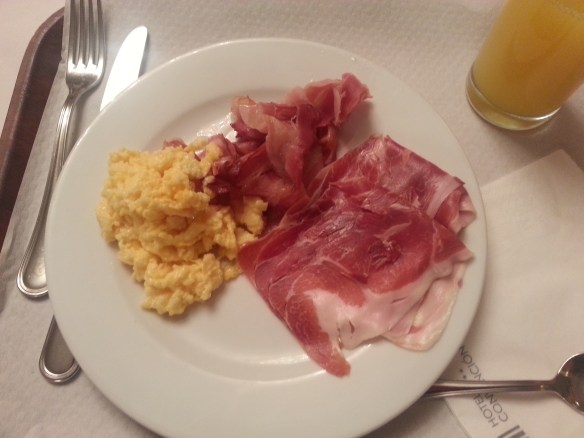
Although I was given breakfast daily at the hotel

20131022_085315

I still had to have a treat I had been told many times about in the few days I was hearing about Madrid

20131023_085757

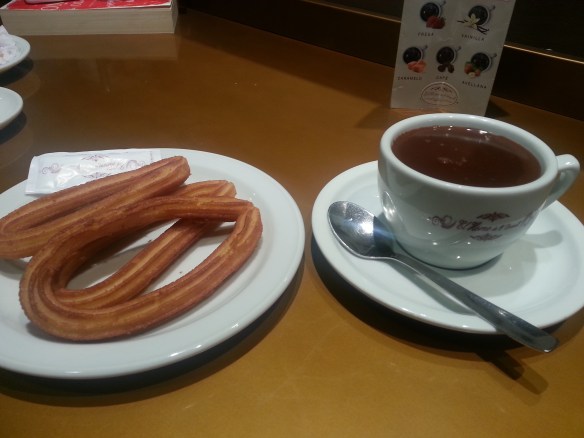
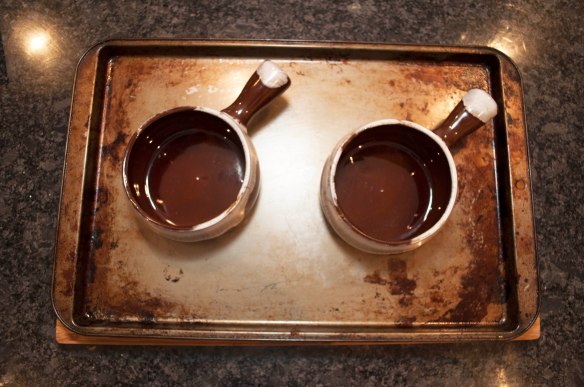
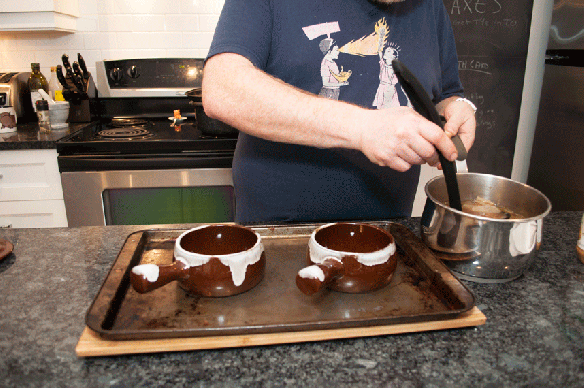
Churros y chocolate … yep, a cup of melted chocolate and a plate of hot churros to dip in the chocolate

I got to see much in my unexpected week in Madrid, but obviously there is so much more. One day I plan to go back, this time take Claire … an amazing city that I had never really ever given much thought to, but now I think about it often.


“Quick and Easy” Huevos Rancheros

huevos_48

In the morning, once I have had my coffee, I usually start to debate on whether I’d like something quick and easy to make for breakfast, or if I should do something “fancy”. This amazing recipe will let you do both!

Cheesy eggs with salsa and sour cream, served on a corn tortilla … you’ll look like a star!

huevos_02

Enough talking, I am hungry and want this already!

huevos_01

Here are the simple ingredients you’ll need:

  • 4 oz shredded cheddar cheese
  • 4 oz sour cream
  • 4 oz salsa (mild or hot)
  • 2 corn tortillas (small ones, the size of a fried egg!)
  • 2 eggs

huevos_04

On medium-high heat, warm the tortilla until it’s getting a little brown. Flip and do same for other side. Place tortillas aside.

g-eggs

In a pan with some butter, on medium heat, get the eggs frying (don’t break those yolks!)

Put cheese on top of the eggs. Cover the white parts but try to leave the yolks uncovered

huevos_18

Let this cook and go back to your tortillas

Get that salsa and cover each tortilla, leaving a tiny bit of room from the edge

huevos_23

Okay, pretty easy. right?

Get that sour cream and put a dollop in the centre of each tortilla, on top of the salsa

huevos_28

Now we’re ready for those eggs

Get an egg and put on top of each tortilla you have prepared

huevos_36

That’s it!

huevos_45

Doesn’t this look good?

huevos_39

You can top with more salsa or serve them as they are

huevos_37

So there you have it, “Quick and Easy” Huevos Rancheros

huevos_46

Bon Apetit!


French Onion Soup

fronionsoup_85

Spring has arrived in Montreal … so now mixed in with the snow we get some very cold rain. On days like these, there’s nothing quite like hot, cheesy French Onion Soup to warm you up!

I’m going to show you how to make this restaurant favourite right in your own kitchen. Get ready to be a superstar!

fronionsoup_01

Here’s what you’ll need:

  • 2 large Spanish onions
  • 4 oz of shredded or sliced Swiss cheese
  • 4 oz of shredded Gruyère cheese
  • 2 cups (one box) beef stock
  • 1 slice of baguette per bowl (toasted or day old)
  • oven proof bowls or crocks

In this post I’m going to prepare 2 bowls, but the soup is actually enough for 4 bowls

fronionsoup_08

Melt butter in a medium sized pot on the stove

g1-onions

Chop and add the onions to the butter

Cook over medium-low heat, stirring constantly, until the onions start to get translucent

Here I added a pinch of herbs de province … just season to taste (pepper is good here)

g4-pour-stock

Add the beef stock.  Now … let’s add something special I didn’t talk about at the top!

fronionsoup_31

Semi Dry Sherry!

g5-add-sherry

Pour in about as much as you would for a shot (1 oz). If you don’t have sherry, try some wine … white or red will give different flavour profiles … play around!

Let this soup simmer on the stove top for about an hour

fronionsoup_40

Get your oven proof bowls and place them on a baking sheet

g6-ladle-soup

Laddle soup into each bowl

fronionsoup_52

Fill to about the 2/3rd full mark

Place one slice of baguette on top of each bowl of soup (alternatively, you can place the baguette at the bottom of each bowl and pour soup over top)

Cover each bowl with shredded or sliced Swiss cheese

g9-add-gruyere

Sprinkle the Gruyère on top of this

fronionsoup_68

Ready for the oven!

fronionsoup_71

This is gonna be good!

fronionsoup_72

Set the oven to broil

Broil until the cheese is bubbling and golden, just starting to brown

fronionsoup_81

Carefully take those bowls out, it’s ready to eat!

fronionsoup_83

So there you go, nice, warm, cheesy French Onion Soup

fronionsoup_84

Bon Apetit!


Peanut Butter Bars

pbbars_77

Two things I think most of you want to hear about a recipe … it’s easy and it’s delicious. Well, here you go … melt in your mouth Peanut Butter Bars that require no cooking and can be made in just a few minutes!

Here’s how we do it

pbbars_01

You’ll need:

  • 2 cups confectioner’s sugar
  • 2 cups graham cracker crumbs
  • 1 cup butter (melted or softened)
  • 1 cup + 4 tbsp of peanut butter
  • 1 1/2 cups dark chocolate chips

pbbars_03

You’re not going to believe how easy this is … and just how amazing the bars are!

g1-graham-crumbs

Add the graham cracker crumbs to a medium sized mixing bowl

g2-sugar

Add the sugar

g3-mix1

Mix these together

g4-butter

Add the butter

g5-mix2

Mix again!

g6-peanut-butter

Add 1 cup of peanut butter

Mix until you have a nice, smooth batter

g7-pour

Pour this mixture into a 9 x 13 pan

Spread evenly to cover the entire pan

pbbars_48

Looking like this? Great! Now, put this pan in the fridge for about an hour …

pbbars_49

Internet magic and it’s an hour later! Your base should now be solid

pbbars_51

Melt those chocolate chips!  I like to just use the microwave … less clean up, really easy to do as well

Add in those extra 4 tbsp of peanut butter and mix well. This step is going to keep the chocolate from becoming too hard. If you miss this step,  once cooled the chocolate layer on top will just come right off the peanut butter bottom! (This is quite tragic when you are about to eat a lovely peanut butter bar …)

g8-chocolate

Pour the chocolate over your base

Try to get it evenly spread across the entire surface.

Place it back in the fridge to cool (about half an hour to an hour)

pbbars_73

Chocolate should be solid, but not hard

pbbars_75

Now grab a knife and cut into squares!

pbbars_76

Place on a plate and serve!

pbbars_81

So there you have it … simple yet delicious Peanut Butter Bars!

pbbars_80

Bon Apetit!

Croque Monsieur

croquemon_102

Seems one day around the turn of the century, someone in Paris looked at the simple grilled cheese sandwich and thought “I should make that way more complex!”. Thing is, it’s also way more tasty … and versatile.  If you add a fried egg on top, you have the Croque Madame (named because the egg apparently looks like a ladies’ hat). A few more tweaks, you have the classic Reuben.

Let’s see how to makes this Parisien bistro classic

semlor_204

Here’s what you’ll need:

  • 4 slices fresh bread, one that is light and airy
  • 3 tbsp butter
  • 4 oz shredded Gruyère cheese
  • 2 slices Gruyère cheese
  • 4 oz sliced ham
  • 1 cup milk
  • 2 tbsp flour (all-purpose)
  • 1/4 tsp nutmeg

croquemon_001

Our first step is creating a Béchamel sauce, as we’ve done before!

First, we melt 2 tbsp of butter in a sauce pan

g1-add-flour

Add flour to the melted butter

g2-nutmeg

and the nutmeg

croquemon_009

Stir together to create a roux

croquemon_012

Slowly add warm milk until you have a smooth sauce.

croquemon_014

I find a whisk is ideal for this!

Melt the remaining butter and bush it on one side of each slice of bread

Add 2 slices of bread, butter side down to a skillet over med-high heat

Get that Béchamel and spoon some on each piece of bread

Place the ham on top of the bread

croquemon_044

now add the slices of cheese … see, this isn’t too hard!

Place the other slices, butter side UP on top


Grill both sides until nice and golden

Transfer the sandwiches to a baking pan or sheet

g6-top-sandwiches

Spoon the remaining Béchamel sauce over the top of the sandwiches

Cover with the shredded cheese … use it ALL! (you will thank me for that)

croquemon_079

Place this in the oven to broil …

Keep an eye on them … broil until the cheese has fully melted and started to brown slightly

croquemon_099

Transfer to plates … eat!

croquemon_101

So there you have it, the Croque Monsieur

croquemon_098

Bon Apetit!


Semla Buns (Semlor)

semlor_200

This Swedish treat, usually enjoyed during lent, is a wonderful cardamom bun filled with marzipan and whipped cream!

These are good … these are so good that King Adolf Frederick of Sweden was said to have died on February 12th, 1771 after having eaten 14 of them at one sitting!

Now, if this isn’t making you want to try them, I don’t know what will!

Let’s get started, it’s a big recipe

semlor_004


What you’ll need:

  • 5 cups of flour (+ 1 cup later)
  • 2 eggs
  • 1 package of yeast
  • 1 tsp of ground cardamom
  • 1 1/2 cup milk (warm) (+ approximately 1/2 cup later)
  • 2/3 cup butter
  • 4 tsp baking powder
  • 1/2 cup white sugar
  • 5 oz marzipan (we’ll show you how to make it later on if you can’t find it)
  • confectioner’s sugar for dusting

g1---pour-milk

Add milk to saucepan on low heat

semlor_013

Heat to between 70F – 80F

g2--milk-to-bowl

Pour milk into large mixing bowl

g3-add-butter

Melt the butter and add

Add the eggs and whisk together

g6-yeast

Sprinkle the yeast over top

semlor_041

Let yeast sit for about 5 min

Sift the sugar and cardamom with 5 cups of flour

Add to the egg mixture and mix well

Once done, cover and let it sit for 30 minutes

After 30 minutes uncover and add 1 cup of flour sifted with the baking powder

g12-knead-dough

Knead the dough!

Get a couple of greased baking sheets. Roll the dough into small balls, enough to make approximately 16 buns. Big or small, you decide!

semlor_100

We did a mix of both

g13-cover2

Cover and let them rise for about 40 minutes (should just about double in size)

semlor_107

Once done, place in a 375F oven for 10-15 minutes

semlor_138

Take them out once they’re golden …

semlor_141

Place the buns on a wire rack to cool. We want them room temperature for the next step

In the meantime, let’s make some marzipan!

semlor_110

You’ll need some ground almonds (about a cup), another cup of confectioner’s sugar, a teaspoon of corn syrup, 1/2 tsp water and almond extract!

Sift the almonds and sugar together in a medium sized bowl

Add 1/4 tsp of almond extract to corn syrup and add it to the mixing bowl

Add the water and start to combine by hand. If the marzipan isn’t forming together, add another 1/2 tsp of water. You should end up with a firm dough

g15-cut-top

Now you want to take each bun and slice off the top about half an inch

Hollow out each bun, putting the scooped out bits in a bowl

Add 5 oz of marzipan to the bowl and milk to soften. Mix until you have a texture slightly like a pudding

semlor_175

Look like this? Good!

g20-fill-semlor

Fill each bun with your marzipan filling

g21-whipped-cream

Cover with generous amounts of whipped cream!

Put the tops back on … almost done!

g22-sprinkle-sugar

Sprinkle with confectioner’s sugar!

semlor_199

Semlor! Try not to die eating 14 of them …

semlor_201

Some Swedes like to have a Semla bun in a bowl with warm milk poured over top … I don’t do it, but you might like it!

semlor_200

Bon Apetit!

French Canadian Pea Soup

peasoup_099

Living in Quebec, we’ve learned to love many Quebequois foods. One traditional food that can’t be beat on a cold night here in Montreal is French Canadian Pea Soup.

A thick, stick to the ribs soup with huge pieces of smoked ham, you’ll love it!  Even better, this isn’t hard to make …

peasoup_001

You’ll want:

  • 2 1/4 cups of yellow split peas (soaked overnight)
  • 1 cup chopped onion
  • 1 cup (3-4) chopped carrots
  • 1 kg (approximately) smoked ham WITH the bone in
  • 1L chicken stock (one box is perfect)
  • 1 tsp thyme
  • salt & pepper to taste

peasoup_004

Grab your peas that have been soaking in water overnight. If you find all the water has been absorbed at any time, just add a bit more. Keep adding water until you no longer notice it being absorbed by the peas

g1-add-peas

Pour those peas into a large pot. If there is extra liquid, just pour it all in

If you want to save a step here, you can soak the peas overnight IN the pot you’re going to use. Just make sure you add enough water to get those peas soft.

g2-onions

Add the onion

peasoup_019

See, this isn’t hard!

g3-cut-ham

Grab that big ham and cut it into pieces that will fit nicely in the pot. Make sure you have that big ham bone!

g4-place-ham

Ham bone in the pot!

g5-add-ham

Add in the rest of the ham

peasoup_041

Space it evenly around the pot

Add the thyme

Now, you probably think I’m gonna tell you to add the carrots … I am not!

Carrots added this early will basically become mush by the time this is cooked

Pour stock over top until it’s all pretty much covered and stir

peasoup_059

Bring the soup to a boil and reduce the heat

peasoup_060

After about 10 minutes you should see quite a foam being formed by the peas!

Lower the heat to a simmer and let it cook for about an hour, covered

Once the peas have for the most part dissolved and the soup is now thick, time to add the carrots

g9-carrots

Pour in the carrots

g10-stir2

And stir. Let this simmer covered for about another 20 minutes

g11-remove-ham

With tongs, remove the ham to a separate plate

Cut the meat off of any bones, and cut up your large pieces of ham into pieces that will fit on a spoon

g13-return-ham

Return the ham to the soup … without the bones!

g14-stir3

Okay, this is ready to serve!

peasoup_105

Serve along with a sourdough baguette ….

peasoup_107

Now, THIS is a meal

peasoup_110

Savoury, smokey and thick enough to keep the spoon standing, French Canadian Pea Soup

peasoup_099

Bon Apetit!

Pyttipanna (Swedish Hash)

pyttipanna_106b

This traditional Swedish comfort food, called Pyttipanna (which I’m pretty sure translates as ‘pieces in the pan’ and is pronounced like pity panna),  may have an exotic sounding name, but as you’ll see it’s all ingredients that are well known and loved!

Great on a cold day, it’s easy to make for dinner or a hearty breakfast!

Let’s see how it’s done

pyttipanna_027

You’ll need:

  • 2lbs diced potatoes
  • 1 cup diced onions
  • 3-4 slices of bacon, chopped
  • 3-4 sausages (we used bratwurst) chopped
  • 2-4 eggs (one per serving)

Melt some butter in a large skillet on medium heat

g1-onions

Add onions

g2-potatoes

Add the potatoes

Salt and pepper to taste

pyttipanna_047

Ready to go!

On a low-medium heat, stir until well mixed and then cover. This will allow the potatoes to cook faster

g7-bacon

In a separate frying pan, add the bacon

pyttipanna_068

and the sausage

g8-stir2

Get the meat cooking!

g9-cooking

Check on the potatoes, make sure they aren’t sticking to the bottom of the pan. If they are, you can add a little vegetable oil. Potatoes are done when they’re soft (but not mushy)

g10-add-meat

Take the meat off the heat and add it to the potatoes

Mix together

Once mixed, spoon individual servings into bowls

Almost done, but one more step!

pyttipanna_092

Go get those eggs!

In the skillet you cooked the meat, fry up one egg for each bowl (sunny side up is best!)

You want the eggs to still have a runny yolk

Place an egg on each serving

pyttipanna_108

Give each person a bowl with an egg

g12-mix

Let them mix it all together

pyttipanna_117

Pyttipanna!

pyttipanna_119

I’m just gonna eat this now … you look at some more pictures!

pyttipanna_107

They you have it, Pyttipanna or Swedish Hash

pyttipanna_108

Great for dinner or a hearty breakfast!

pyttipanna_105b

Bon Apetit!


Crème brûlée

cremebrul_146

The classic French dessert, we’re going to use one last special kitchen item … a blow torch!

In the immortal words of Homer Simpson “fire made it good!”

Okay, so, how’d we do this?

cremebrul_005

To start, this is what you’ll need:

  • 1 1/4 cups of heavy cream
  • 2 egg yolks
  • 1 tsp sugar
  • 1 tsp vanilla

cremebrul_007

Grab a bowl for mixing. This glass bowl is being held in place by a lovely kitchen gadget called The Staybowlizer given to us by our equally lovely friends Tom and Lindsay

g1-eggs

Add the yolks to the bowl

g2-sugar

Add the sugar to the yolks

g3-whisk1

Whisk together until smooth

g4-pour-cream

Now, on a stove top, add the cream to a sauce pan

g5-add-vanilla

Add the vanilla

g6-stir

and stir.

(Other flavours can be added … heat with some peach leaves for a nice almond taste in your custard … just remember to remove the leaves after heating it up!)

cremebrul_077

Warm gently on the stove until the mix is now warm but not hot enough that it will cook the eggs

Slowly pour the cream into the mixing bowl, whisking the entire time

cremebrul_062

This looks properly mixed!

g9-pour-pot

Now you’re going to take the bowl and pour the contents back into the sauce pan

Gentle heating again until the liquid is just reaching the boiling point. You should be able to draw a line on the back of a wooden spoon when it’s ready

g11-pour-ramekin

Spoon the custard into individual ramekins or bowls

cremebrul_002

Let the custard set overnight in the refrigerator

Next day, time to make the crust!

cremebrul_095

You’ll need sugar (we’re using demerara style) and a blow torch

cremebrul_112

You can get this type of blow torch at most kitchen supply stores. They use butane and are filled like a common butane lighter.

g12-sprinkle-sugar

Sprinkle the sugar over the entire top of the chilled custard

cremebrul_109

Get as much coverage as possible

g13-torch1

Using the torch, heat the sugar on top to the point of burning

g14-torch2

Don’t panic if you see smoke coming off the sugar

Keep going until all the sugar has been torched

g15-crack

Once it’s cooled, it’s ready to eat!  Crack the hard sugar top with a spoon!

Don’t mind me … just gonna eat this here

cremebrul_144

So there you have it … Crème brûlée

cremebrul_146

Bon Apetit!

Duck Breast Sous Vide

svduckbreast_145

Okay, so today going to continue our theme of recipes that require some special equipment in the kitchen. We’re going to be doing Duck Breast Sous Vide.

For many of you, you’re thinking “okay, I’ve heard of this sous vide … it’s that thing that seems to impress the judges on Chopped”. Yes, that’s true … but let’s talk about what sous vide cooking actually is.

Sous vide is French for under vacuum. In this process, the food (usually a protein like steak or duck) is sealed in a food-grade plastic bag, under vacuum (see, that’s where the sous vide comes in!), and placed in a strictly temperature controlled water bath to cook. Why do this?

Okay, let’s look at beef. A steak is rare at a temperature of 52C. So, you want to make sure the internal temperature is 52C. Typically you grill a steak and hope to remove it in time. The heat, having come in from the outside (at a very high temperature) will cook the exterior to a very well done level, only being rare once you get towards the centre. Timing depends on thickness.

Sous vide cooking is what I would call equilibrium  cooking. The water is kept at exactly 52C in this case. The meat, sealed in a bag, is placed in the water. After about an hour, the contents of the bag will have reached the same temperature as the surrounding water. In other words, the meat will be cooked to rare … through out the entire steak, evenly.

Here’s the even cooler part … if you left the steak in there for four hours it would still be perfectly cooked to rare! You can’t overcook in the sous vide method … the meat can never be a higher temperature than the surrounding water, it’s just thermodynamics!

Okay, you probably want to see this at work … so let’s do that most finicky of meats to get right, duck breast!

svduckbreast_005

Here’s the stuff you’ll need for doing this at home. A sous vide vacuum sealer, food grade plastic bags for sealing, a water circulator, a large pot … and of course the duck breast!  (You can also get one piece controlled water baths but a circulator will cost about half as much)

First we prepare the duck breast!

g1-score1

Take your duck, skin side up, and make diagonal slices across the skin

g2-score2

Repeat the process with diagonal slices the other way, to create a diamond pattern

svduckbreast_026

This is going to allow the fat in the skin to render without too much shrinkage

Season normally, with salt, pepper and a bit of thyme

svduckbreast_032

Now, go grab a large sous vide bag. It’s important that you have a bag that was meant for heating the food. A low quality plastic will have chemicals leech into the food during the cooking process.

Place the duck breast into the bag, leaving about six inches from the top

svduckbreast_037

Now, our first piece of special equipment, the sous vide vacuum sealer

The sealer I am using is from Sous Vide Supreme

svduckbreast_038

With the bag laying flat, put the open top under the tabs in the sealer

g3-vacuum

Press with both hands until you hear a click, then walk back and let the sealer do it’s magic! The machine will stop when the vacuum has been created and the bag heat sealed.

svduckbreast_047

Your duck breast is now ready for the next step!

You can see the bag is tightly sealed … isn’t this cool?

svduckbreast_051

Fill a very large pot (like a stock pot) with water … fill it high, don’t be shy! (yea, I’m gonna claim that rhyme)

svduckbreast_050

This is my water circulator, from SansaireThe combination of a circulator and a large pot is by far the most cost effective method … a one piece heated water bath usually is about double the price. This circulator will heat the water to a specific temperature and keep it at that temperature within 0.1C for as long as I want!

Place the circulator in the water. This one attaches to my pot with a nice metal clip!

When I turn it on, I see the current temperature of the water

Set the temperature to 57C, which is the internal temperature we want for a medium cooked duck breast (it will be wonderfully pink, as duck breast should be!)

svduckbreast_064

The reading will go back to show the current temperature of the water. Once it hits 57C, we’re ready to add the duck!

g4-into-water

Place your bag into the water, make sure it’s fully submerged. As there is little air in the bag, it should submerge easily

g5-cooking

Now, you let this cook for at least one hour. Remember, the meat will never get to a higher temperature than this, so you can’t overcook it! (If left for many hours, the meat may get very soft … which if you are using a cheaper cut of beef can be good actually).

Don’t panic if the temperature drops 0.2 or 0.3 degrees when you add the cold meat … it will come back up.

svduckbreast_076

After an hour, remove the bag (using tongs, don’t burn your fingers!) from the water

The duck is now perfectly done

Remove the duck from the bag and place on a plate

svduckbreast_088

Okay, it’s done … but that looks kinda gross. Now, here’s the trick!

g7-pan-fry

Heat a frying pan on the stove medium high heat with a little oil. Place the duck, skin side down in the pan

g8-sizzle

Cook for only about 30 seconds  … just enough to get a crispy golden skin

g9-flip

Flip over and cook other side

g10-sizzle2

Again, like 30 seconds

svduckbreast_112

Now remove them back to the plate

svduckbreast_115

Doesn’t that look better?

Let’s see how they are inside …

Slice the duck breast on a cutting board. In this method, no need to let the meat rest.

svduckbreast_125

Perfect!

svduckbreast_134

Place the meat on a plate

g13-potatoes

Add some sides like a salad and some mashed potatoes …

This is a method used by many restaurants. It allows for the chef to play a bit with the timing, so your steak is always ready exactly on time with the other dishes. It also allows for less experienced cooks to prepare the steaks, as it doesn’t have such strict timing involved!

svduckbreast_144

There you go, Duck Breast Sous Vide!

svduckbreast_145b

Bon Apetit!