Slow-Cooker Pulled Pork & Potato Waffles

ppandpw_229

Sometimes you just need the right tools to complete a job. This week, we’ll be looking a few recipes that require a unique piece of kitchen equipment.

Today, what I’m going to show you requires a slow-cooker and a waffle iron. It’s spicy, sweet, sour and fun!

Let’s get started looking at the ingredients we’ll need for the pulled pork

ppandpw_005

You’ll need:

  • 6-8 lb pork tenderloin or shoulder roast (you can make one smaller, just adjust the recipe accordingly)
  • 2 cups bbq sauce
  • 1 cup chicken broth
  • 1/2 cup apple cider vinegar
  • 1/2 cup brown sugar
  • 2 tbsp chili powder
  • 1 medium onion, chopped
  • 1 tbsp Worcestershire sauce
  • 1 tbsp prepared mustard
  • 1 tbsp minced garlic
  • 1 tbsp dry thyme

Just to make sure we have all our ingredients, let’s look at what we’ll need for the potato waffles

ppandpw_100

For these you’ll need:

  • 2 cups mashed potatoes (good way to use left overs!)
  • 2 eggs
  • 1 medium onion
  • 1/4 cup all-purpose flour
  • 1 tbsp minced garlic

Okay, so let’s get that pulled pork going. It will need about 6 hours in the slow-cooker so we want to get started early

ppandpw_008

Pour some oil to coat the bottom of your slow-cooker

ppandpw_011

Let’s put that pork in the cooker … this is a lot of raw meat

g1-bbqsauce1

Pour the barbecue sauce into a bowl

g2-bbqsauce2

The entire bottle in this case is 2 cups

g3-pour-stock

Add chicken stock

g5-vinegar

Add cider vinegar

Now add the sugar, chili powder, Worcestershire sauce, garlic and thyme

g7-mix

Mix this all together well

ppandpw_070

Set this aside for a moment

Put the chopped onions into the cooker with the pork

g8-pour-sauce

Pour the sauce over the pork

ppandpw_096

All in there? Good!

ppandpw_097

Now, put the lid on and cook on high 5-6 hours … don’t lift the lid to peek! It lets out the steam and heat and that is how the slow cooker does it’s job!

Now, go do your things … play a video game, read a book, get a waffle iron … whatever you want for the next 5-6 hours

(Internet magic here)

g14-simmer

It’s been 5-6 hours, the pork has been simmering this whole time and is ready to be  pulled

g15-pull

I usually just get two forks and pull in opposite directions

ppandpw_172

Pork should come apart rather easily.

ppandpw_176

Keep going until there are no longer any large pieces. Make sure to mix it all well with the sauce and juices

Now, let’s make some waffles!

g9-onions

Heat some butter in a hot skillet and add onions

Add the garlic and stir.

ppandpw_118

Cook until onions are soft and getting transparent

g11-potatoes

Put your mashed potatoes in a mixing bowl

Add flour and eggs

g12-add-saute

Empty skillet into the bowl

ppandpw_148

Ready to mix!

Mix until well blended and it has the consistency of a thick batter

Now, get that waffle iron heated up. Spray the surfaces to make sure nothing sticks!

g16-pour-batter

Spoon mixture onto hot iron, allowing about an inch from the edge

ppandpw_189

Ready to press!

ppandpw_193


Close the iron and let it cook for 3-4 minutes, until the waffle is golden brown and able to be lifted from the iron

g17-reveal

Should look pretty much like this

ppandpw_201

Okay, let’s get this on a plate!

Lift out and place on a plate

Now, back to that pulled pork!

ppandpw_209

Place the pulled pork directly on your potato waffle

g18-plating

Drizzle on some of that sauce like it’s maple syrup!

ppandpw_223

Looking good!

Myself I like to add a swirl of sriracha sauce on top

ppandpw_230

Like this!

ppandpw_229

Slow-Cooker Pulled Pork & Potato Waffles!

ppandpw_227


Bon Apetit!


Oven-Baked Buffalo Wings

buffalowings_095b

Okay, so your guests come over to watch the Super Bowl and you made that amazing Cheesy “Pull Apart” Garlic Bread I showed last post. They loved it, but now it’s approaching half time and people are getting hungry.

Did you think I’d leave you stranded now?

Here are amazing Oven-Baked Buffalo Wings that you’d swear came from a restaurant!

Let me show you how it’s done!

buffalowings_001

Here’s what you’re gonna need:

  • 16-20 split chicken wings
  • 3/4 cup all-purpose flour
  • 1/2 tsp cayenne pepper
  • 1/2 tsp garlic powder
  • 1/2 cup melted butter
  • 1/2 cup hot sauce (I’m using Frank’s Red Hot)

buffalowings_005

Add the cayenne to the flour

buffalowings_007

Now add the garlic powder

buffalowings_009

You can add some salt to taste at this point. Remember this is gonna be heavily sauced so you don’t need to add too much.

g1-blend

Blend the dry ingredients well

g2-in-bag

Pour the flour mixture into a large, resealable plastic bag

buffalowings_020

Is it big enough to hold a few wings? Good, then you have the right size!

Make sure the chicken is not wet. Pat it dry with a paper towel.

g3-drop-wing

Drop a chicken wing into the bag

Shake to coat and place in a greased baking pan

Repeat the process until all chicken wings are coated

buffalowings_037

Take your pan of chicken and place in the fridge to cool for an hour. This makes sure that the flour coating sticks!

buffalowings_038

Internet magic and and hour has passed, let’s make the Buffalo Sauce

g4-hot-sauce

Pour your hot sauce into a medium sized mixing bowl

g5-add-butter

Now add the melted butter … what, you thought these were healthy?

g6-stir

Whisk together

buffalowings_062

Does it look like this? If so, you’re ready to move on to the next step!

g7-dip-wing

Grab a wing and place it in the sauce. Make sure it’s totally coated with sauce!

g8-place-wing

Take the coated wing and put it back in the pan

Do it again for the next wing!

g9-dip-and-return

Keep on doing this …

buffalowings_088

Until all the wings are totally coated

Place in 400F oven for 45 minutes

buffalowings_089

Basically, until they look like this

buffalowings_092

Ready to go!

buffalowings_093

Place them on a plate with some carrot sticks, celery sticks, blue cheese dressing … whatever you like!

buffalowings_095

So there you have it, Oven-Baked Buffalo Wings. Just be ready to have to prove you didn’t order these in from a restaurant!

buffalowings_097

Bon Apetit!


Cheesy “Pull Apart” Garlic Bread

cheesygb_094c

So, the Super Bowl is coming … or you’re having friends over … or you are planning a Netflix marathon. You want a delicious and easy to share snack. Well, we got ya!

Wonderful Cheesy “Pull Apart” Garlic Bread is pretty simple to make and will be descended upon by your guests like a swarm of locusts! You may want to have another for back up …

cheesygb_003

Let’s do this!

cheesygb_002

This one isn’t too complicated. You’ll need:

  • large round or oval loaf of bread
  • 4-6 oz of mozzarella cheese
  • 3-4 oz of soft butter
  • 1 tbsp minced garlic
  • 1 bunch of chives

g1-chives

Chop the chives into small pieces

cheesygb_010

Should be about a handful

g6-add-chives

Add to softened butter

g7-add-garlic

Add the garlic

g8-mix

and mix!

g2-slice1

Take your bread and slice almost to the bottom

g3-slice2

Move over about an inch and slice in the same way. Continue this all the way across the bread!

g4-rotate

Give your bread a 1/4 turn

g5-slice3

and do the same slicing as before

cheesygb_029


Bread should have diamond wedges all over, like this

Now slice the cheese into thin strips

g9-add-mix

Get that butter mixture and spoon it into bread slice

g10-mix2

Keep doing this until all the slices have been filled with the butter mixture

g11-add-cheese

Okay, add your cheese slices in much the same way

cheesygb_072

It’s hopefully looking something like this

Wrap the entire bread in aluminum foil and place on a baking tray in a 350F oven for 20 minutes

After 20 minutes, remove the foil, put the temperature up to 400F and cook for another 5 minutes

cheesygb_086

Now, doesn’t that smell amazing?

cheesygb_084

Ready to eat!

g12-pull-piece

Just grab a wedge of bread and pull!

g13-eat

So good! (you may think this is a repeating GIF animation, but I basically did exactly what you see … it’s very hard to stop!)

cheesygb_094b

Cheesy “Pull Apart” Garlic Bread!

cheesygb_094c

Bon Apetit!


Reykjavík – A Visit to Iceland in February

Reykjavik winter

In February of 2014 we capped off our Scandinavian winter adventure with 4 days in Iceland

iceland-dot-map-1

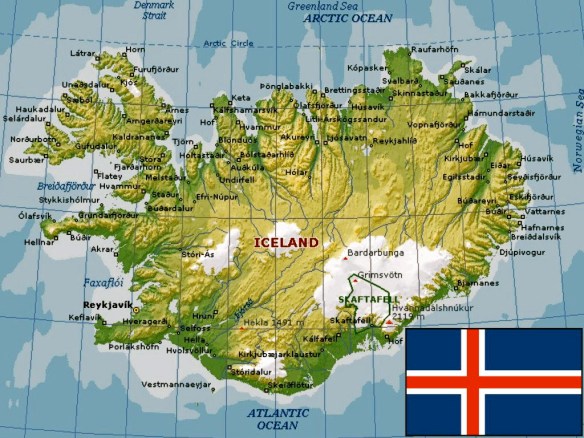
Having landed at the airport in Keflavik we immediately got on our shuttle bus taking us to Reykjavik, where we’d be put on another bus to our hotel. Grabbing handfuls of brochures at the airport, we eagerly tried to figure out all the cool things we’d do over the next four days.


I think during that drive the first thing I noticed about Iceland was that there were NO TREES. There also were very few signs of anyone until we got close to the city. This would be a scary place to have your car break down

Iceland_57

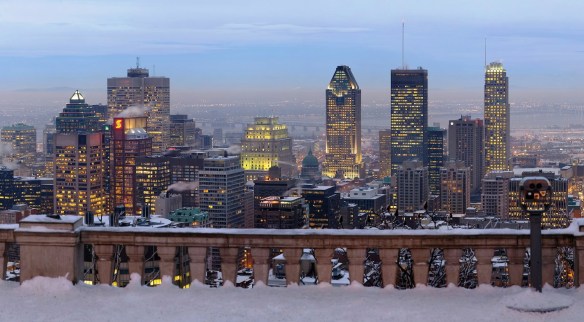
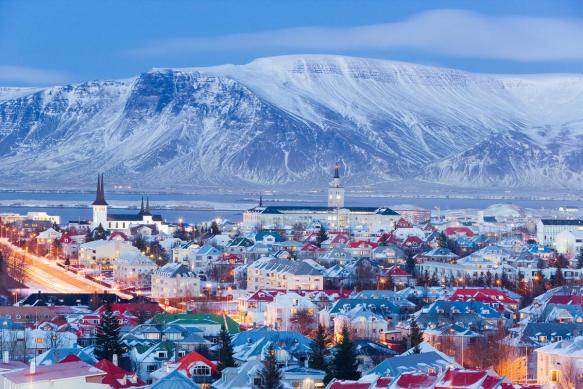
Here’s what you see as you approach Reykjavik …

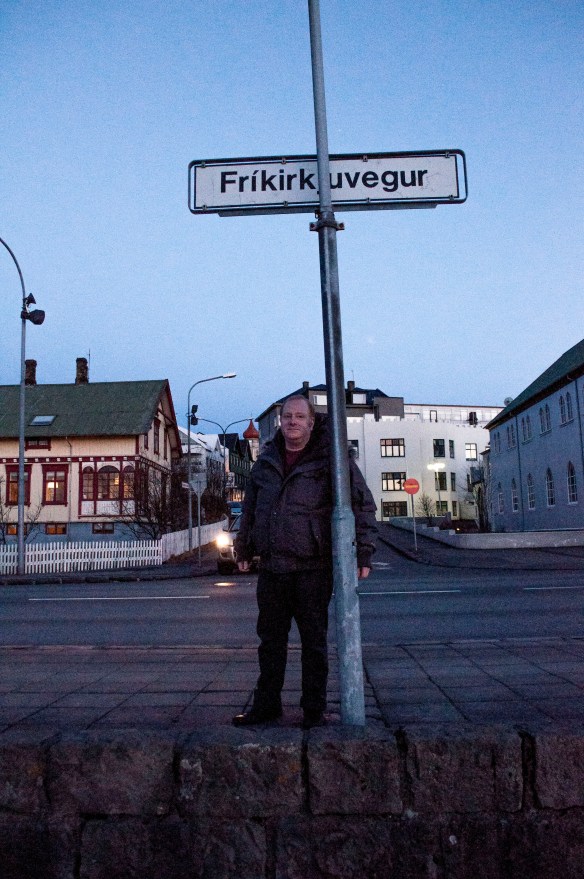
We arrived at our hotel, located at the corner of two very unpronounceable streets

Iceland_84

The temperature here was around -5C, which coming off our time in the north of Sweden, seemed almost tropical!

Okay, you probably see that picture and wonder what I am so majestically looking out upon … (yea, that’s my best majestic look)

Iceland_80


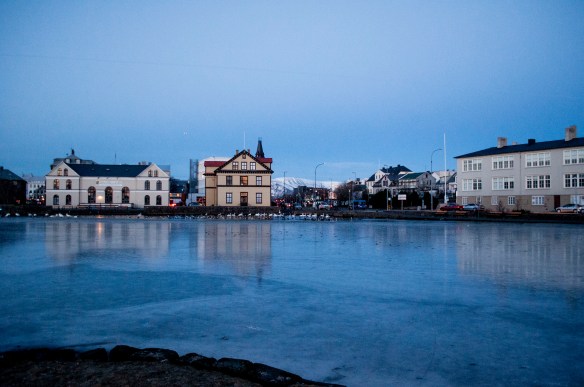
At the bottom of our street was a shallow, frozen lake. This would be great for taking a short cut to the other side!

Looked solid enough. Having spent a few weeks nurturing my inner adventurer, I decided best way to find out was to just walk across it

Iceland_82

Brave adventurer has no fear!

Iceland_29

This totally looks safe!

Iceland_76

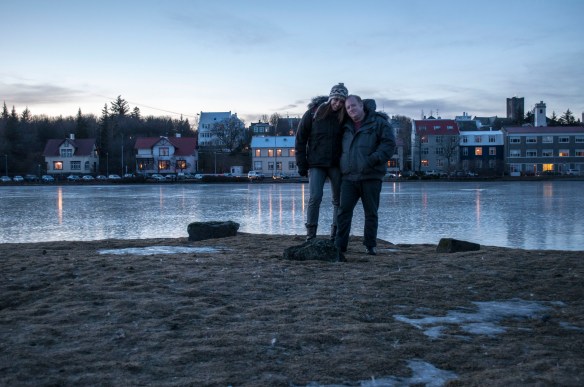
Yea, it’s all good. This little island of land is right in the centre of the lake.

In the area behind us, close to shore, there is an area of the lake that has hot water piped in, keeping part of the lake unfrozen for the ducks and swans!

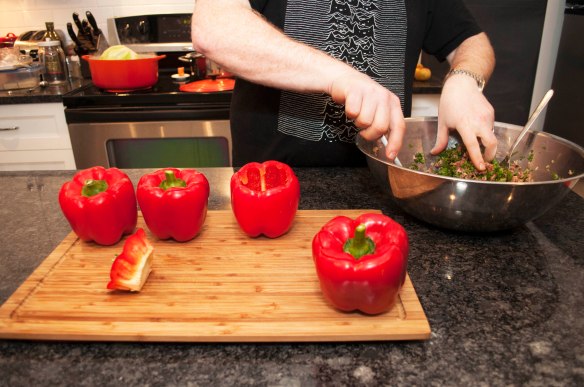
We had come up with a general plan of going horseback riding on the lava fields the next day and visiting the Blue Lagoon hot springs and spa the day after that. Today we would walk around the city a bit, and then find a good place for our Valentine’s Day dinner!

Iceland_87

The main shopping street was just a block over, so we headed to that and just walked uphill. Heck, seemed like as good a plan as any!

You want a stuffed animal that looks like a puffin and says Iceland, or perhaps a plastic horned Viking helmet? (must note here, actual Vikings never wore horned helmets!) This was definitely the street to go for that!

Wait, what’s this?

Iceland_35

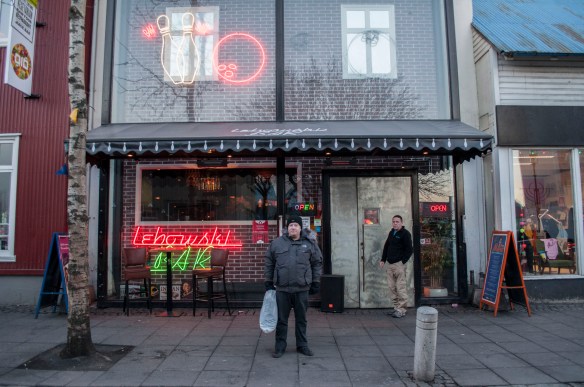
Iceland has a very unique sense of humour and kitsch. Behold, Lebowski Bar. It’s pretty much what you think … a restaurant and bar based on The Big Lebowski. With burgers named after The Dude, Walter, Donny and even The Nihilists (it’s chicken fingers, because they believe in nothing), this is probably the only Cohen brothers inspired restaurant I’ll ever come across … though if I ever see Chez Barton Fink, I may have to check it out!

(Okay, I did go in and have a “Walter” burger … I’m not made of stone!)

Iceland_34

This is way better than “NO SHIRT, NO SHOES, NO SERVICE”

For Valentine’s Day, we opted for something a little more down to earth. We ended up at a wonderful little place called Cafe Loki


night view


Located across the street from the spectacular Hallgrímskirkjathis cafe offered us a chance at some authentic Icelandic food … which as it turns out, is a mixed blessing

Claire, never one to shy away from a challenge, had heard many times of the Icelandic delicacy Hákarl

For those who don’t know what this is, here’s the basic rundown.

You take a Greenland shark, which is toxic, and let it ferment for 6-12 weeks. You then let it dry, cut away the brown crust, cut it into cubes and eat it. This gives it a very strong scent of ammonia (oh, and taste of it too!). While no longer toxic, it’s a stretch to say it has made this edible!

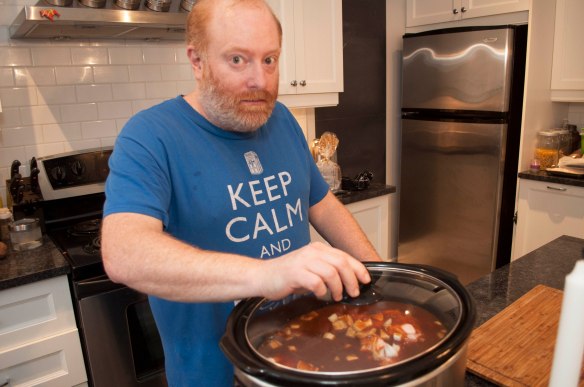
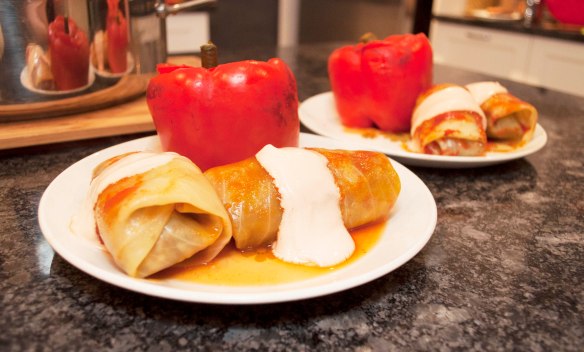
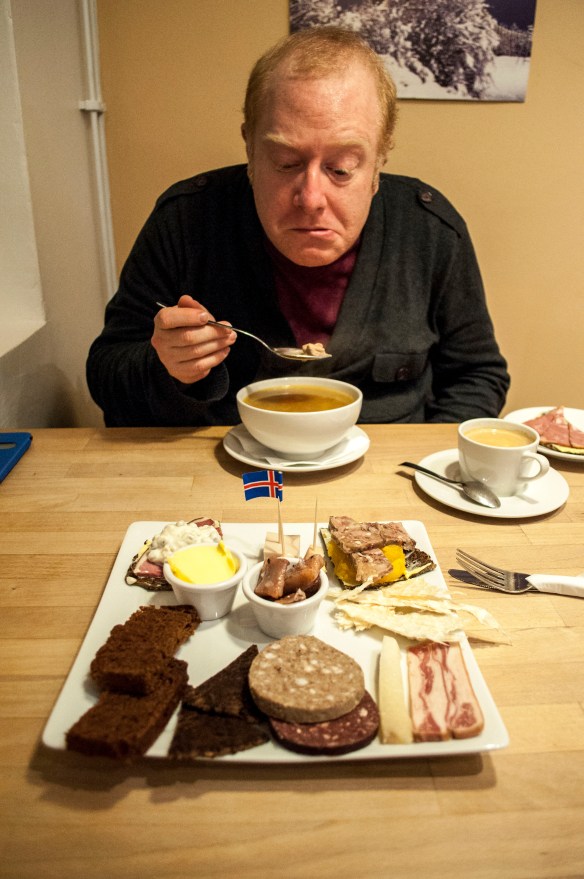
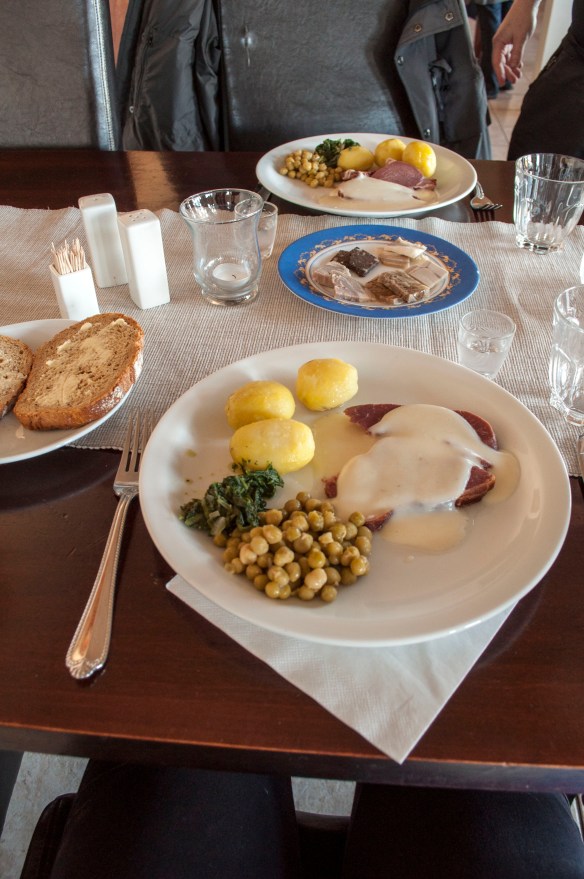
Time to order, I wisely go for a lovely lamb stew. Claire, goes for a special traditional plate called a  Þorramatur

Iceland_64

A collection of traditional dishes, prepared to celebrate during the month of (English spelling here) Thorri, let’s get a run down of the things she’ll be eating …

There’s some Icelandic rye bread, liver sausage, blood sausage, smoked lamb, dry fish. These are all pretty tasty. Then there were a few things we didn’t recognize … and that little square on a toothpick, yea, that’s the hakarl

Note the toothpick with the Icelandic flag … that is attached to a food I will get to in a moment!

At this point I think that maybe if I can just quietly eat my stew …

Iceland_65

Unfortunately, marriage is about sharing …

So, Claire tries the hakarl, making sure to save a bit for me, as there is no way she’s going to do this alone. Watching her face, I knew it was bad. Now, as it happens, we’ve got a video of ME trying it!

Imagine fish that has been sitting in blue cheese for a few months and then a cat came over and peed on it … yea, that’s about it

Okay, nothing could be worse than that. Everything’s okay now ….

That innocent looking cube of “food” with the Icelandic flag is known as Súrsaðir hrútspungar. Having just eaten the hakarl, I was feeling pretty confident I had just tasted the worst thing I ever would in my entire life. I was right for 30 seconds.

Súrsaðir hrútspungar is the testicles of a ram, pressed into a cube, boiled and then fermented in lactic acid (the sour part of sour milk!). My best description of taste of that is traumatizing.

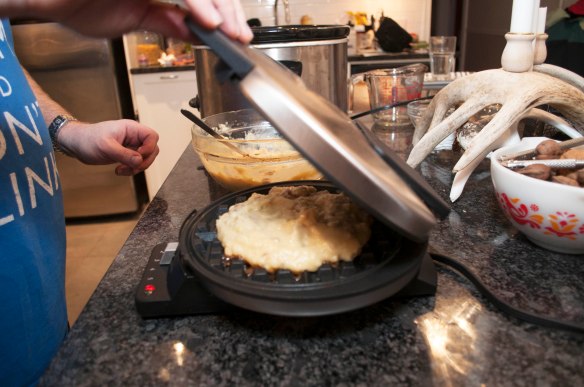
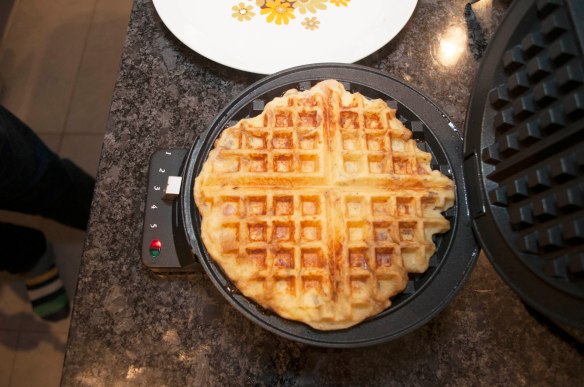
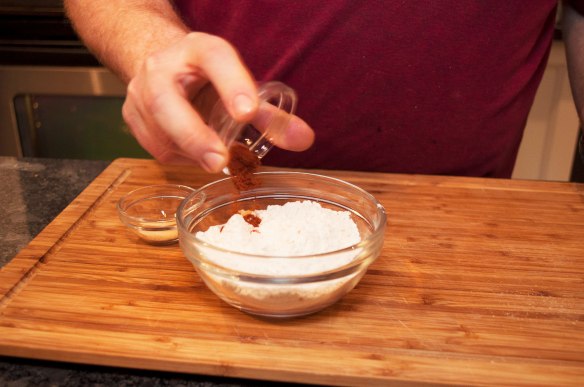
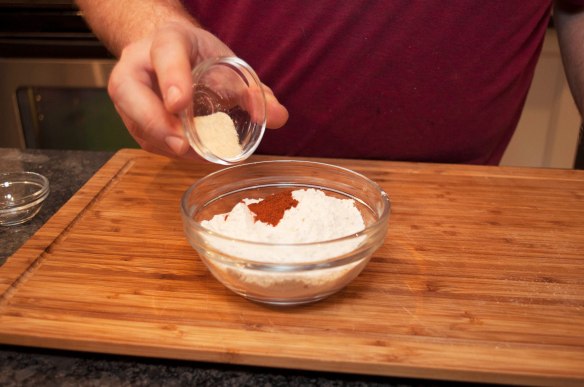
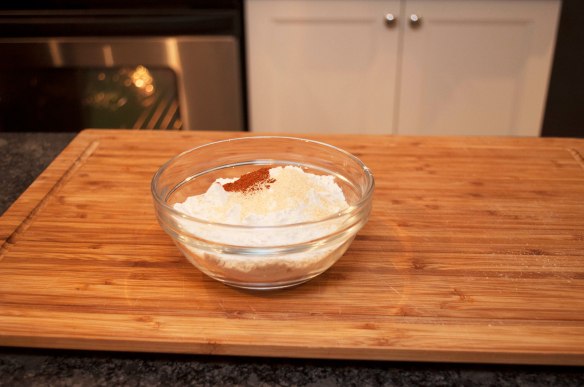
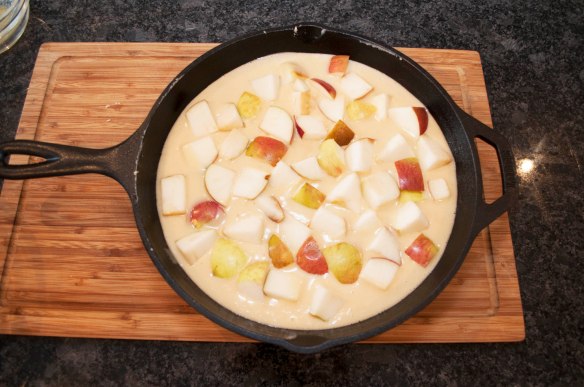
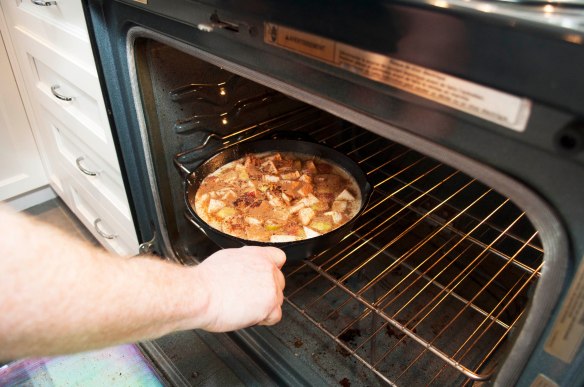
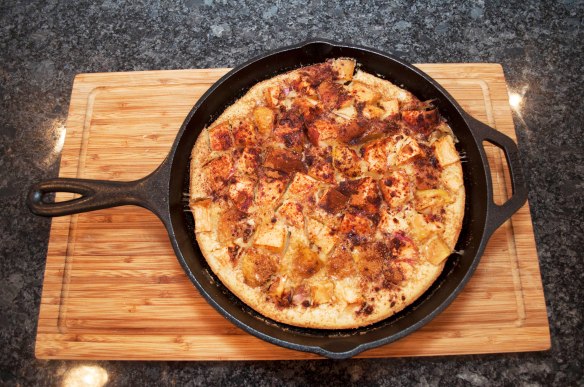
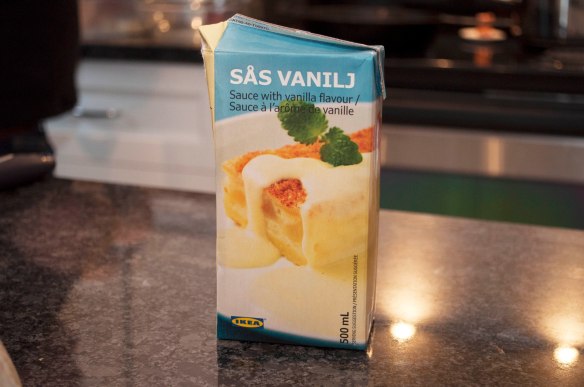
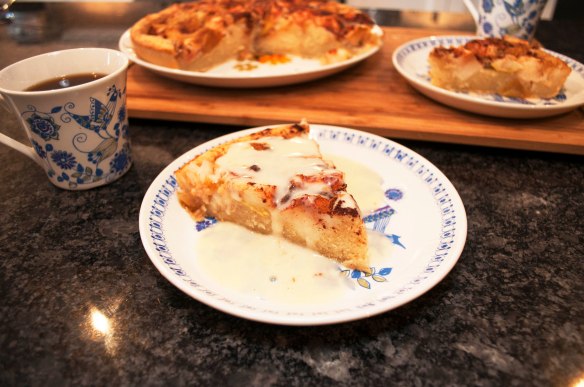
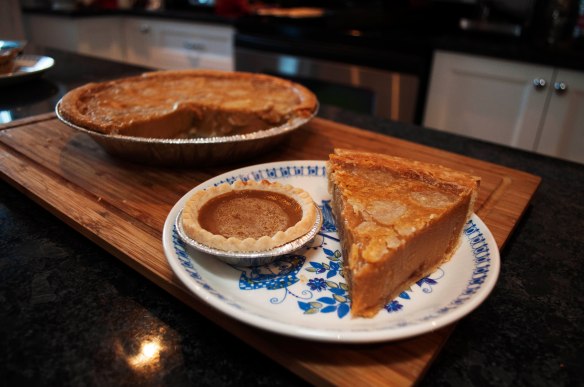
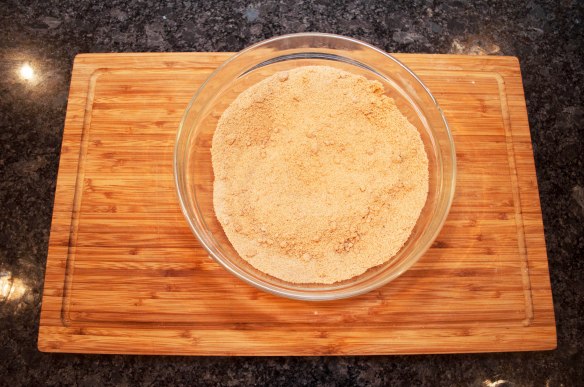
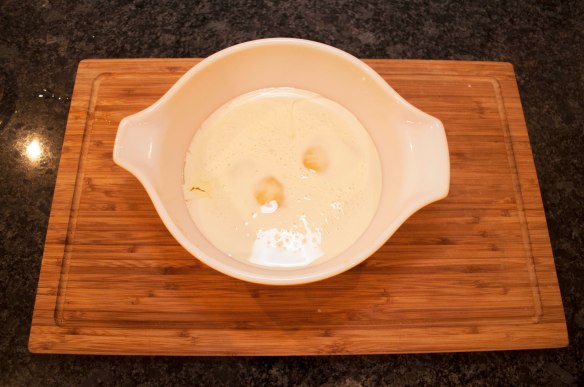
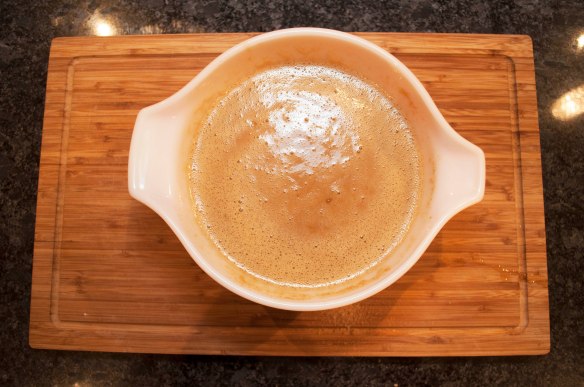
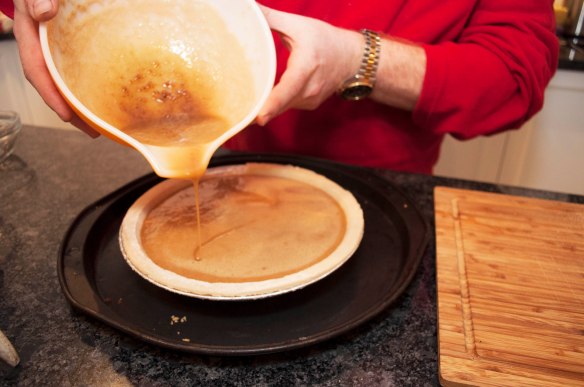
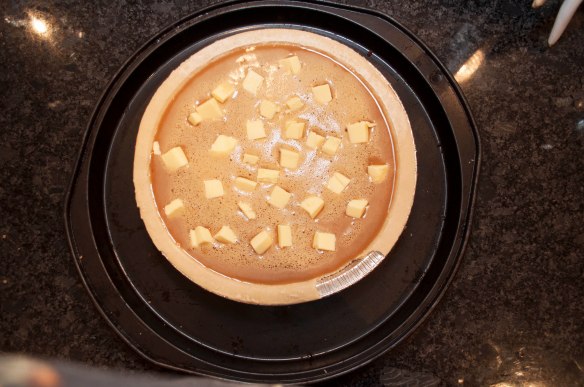
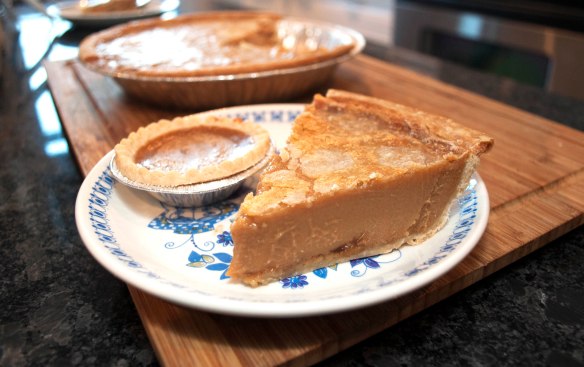
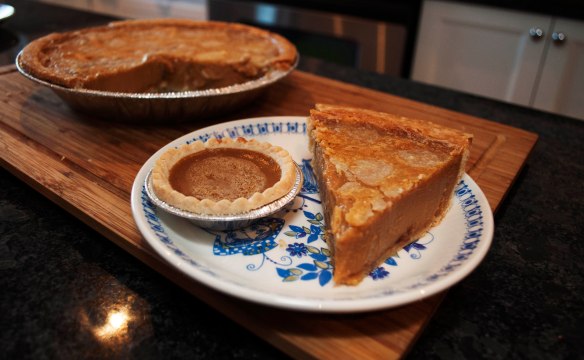
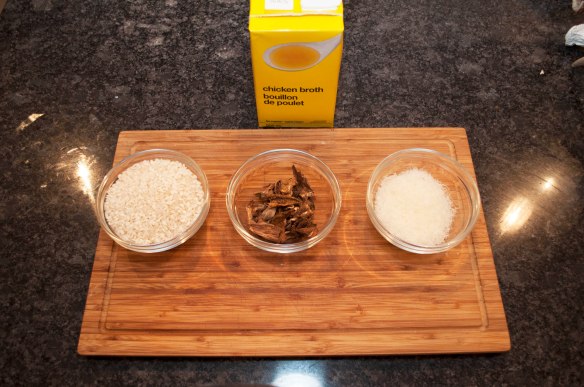
Time for dessert. Again, something a bit strange … rye bread ice cream

Iceland_62

Now, Icelandic rye bread is not like what you are used to here. Cooked very slowly, traditionally in volcanic steam vents, the starches turn to sugar. Icelandic rye is dense and sweet … and unique. When mixed in with a base vanilla ice cream, the results are fantastic.

Valentine’s Day meal is saved! This almost erased the memory of the Súrsaðir hrútspungar

Iceland_61

I think Reykjavik is more beautiful at night

Iceland_60

Time for bed. After all, tomorrow we take Icelandic horses out on the lava fields!

Iceland_55

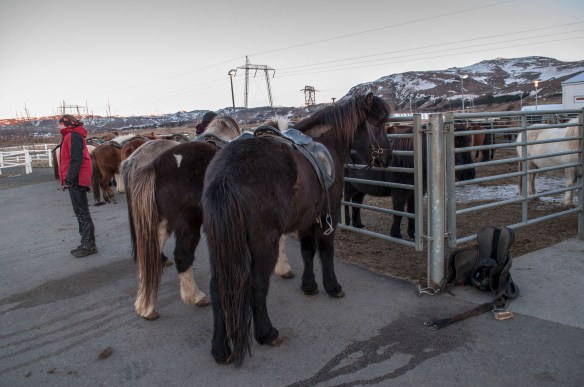
Icelandic horses are smaller, more hairy, and hella fast! They have 2 more gaits than horses elsewhere in the world. The unique “tolt” is pretty fast yet totally smooth … for anyone who knows about riding a horse, this means you can sit flat in the saddle while moving faster than a trot!


on horse

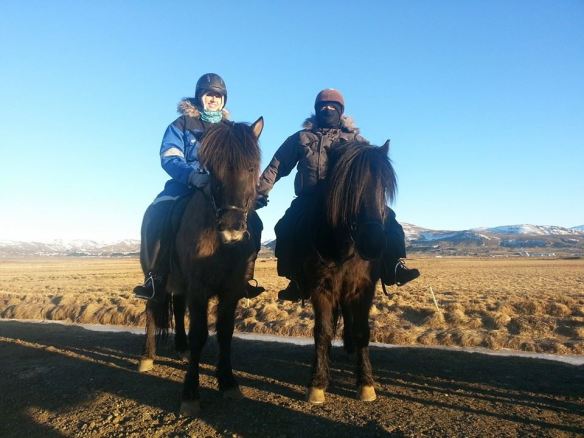
Oh, riding in the winter is cold …

Iceland_10

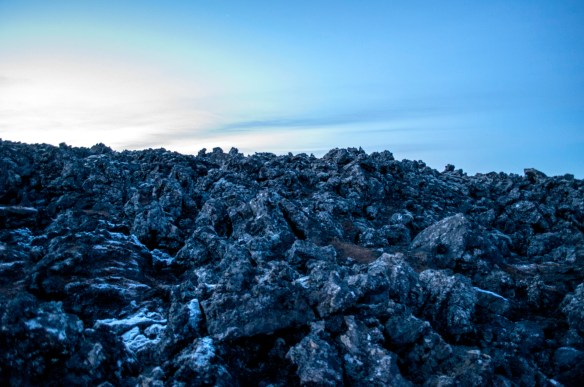
This was what most of terrain looked like. You really didn’t want to fall off!

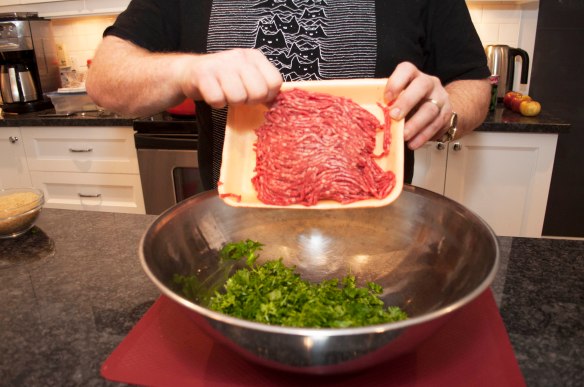
Our excursion included lunch. As we got to the dining room, as Claire headed off to wash up, she jokingly said “Well, hope it’s not another Thorri platter!”

Iceland_53

Seriously?

Iceland_54

Okay, it wasn’t just the platter … and we DID have brennivin to wash away the taste of the ram testicles this time. Yes, we did eat it … we’re Canadian, and we’d rather eat fermented testicles and cat-pee flavoured shark than be rude.

We got back with time to again explore the city

Some advice to anyone visiting, eating at restaurants is very expensive. Groceries on the other hand (other than any vegetables) are quite affordable. Try to stay somewhere with a kitchenette so you can prepare your own breakfasts … this will save you a lot of money!

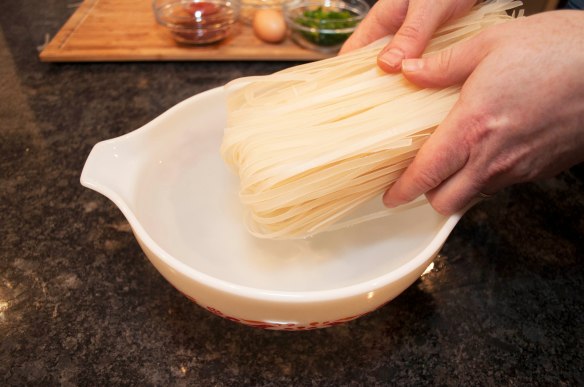
Last full day, and we’re off to the famous geothermal spa, The Blue Lagoon

Iceland_24

Located in the middle of a volcanic wasteland, time to go swimming outside in -5C weather!

Gonna get into that water quickly when you can see ice on all the rocks!

The water was milky and pale blue … and so wonderfully warm!

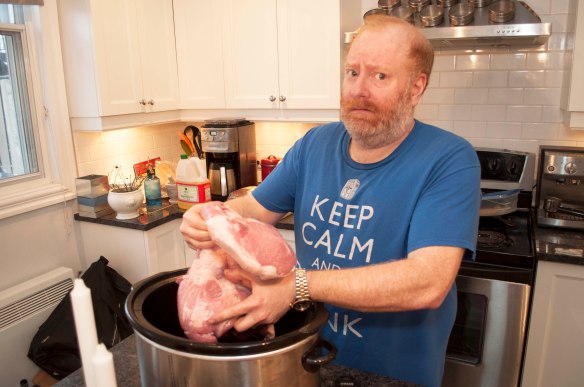
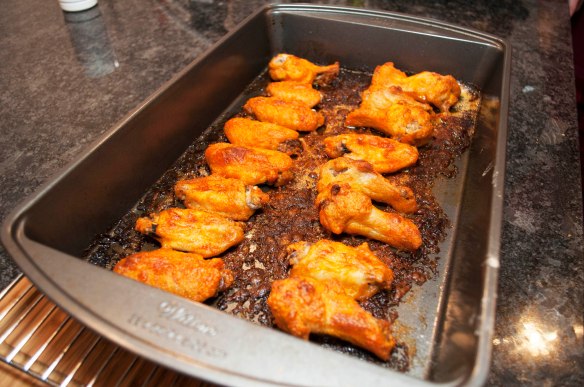
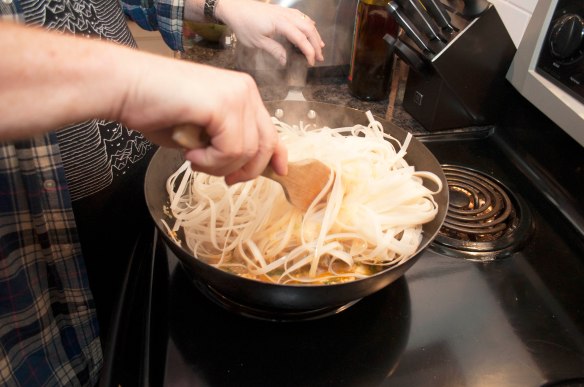
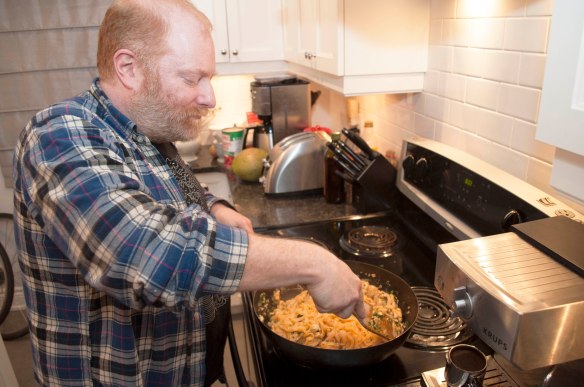
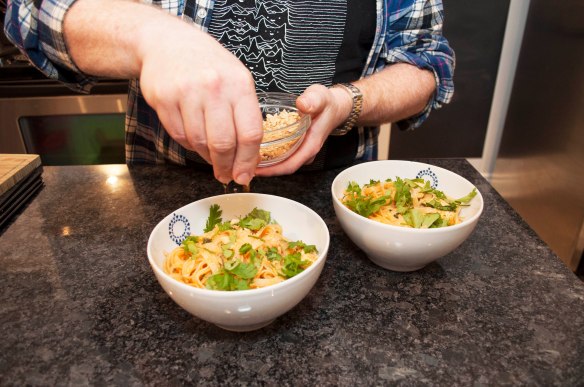
Okay, after being sufficiently melted, time to head back and have one last meal before heading back to Canada. This time, really gonna try to avoid ram testicles!

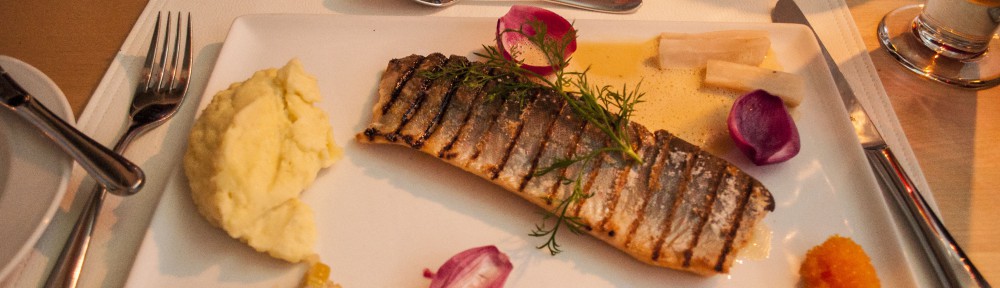
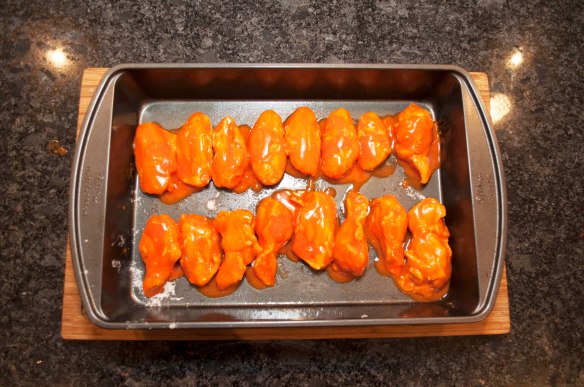
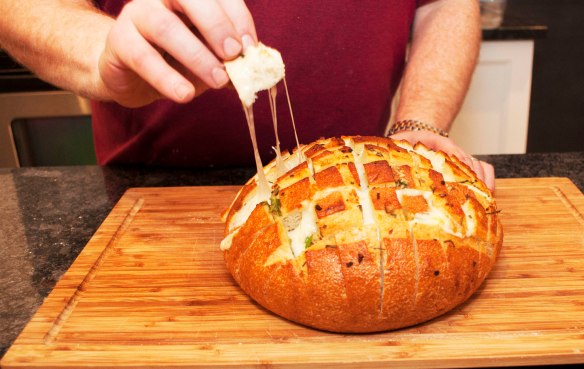
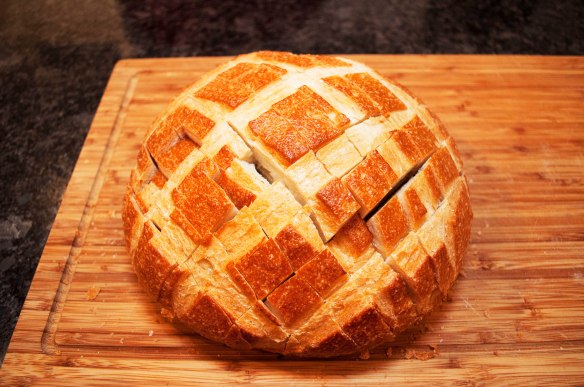
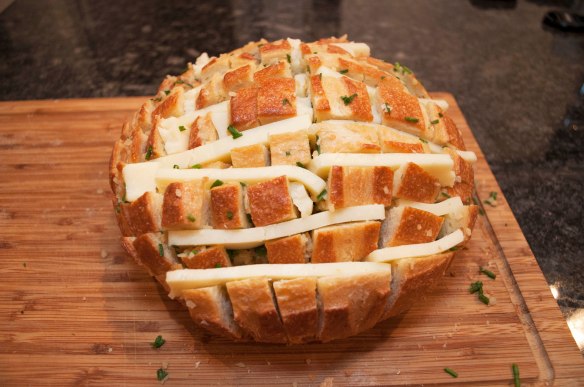
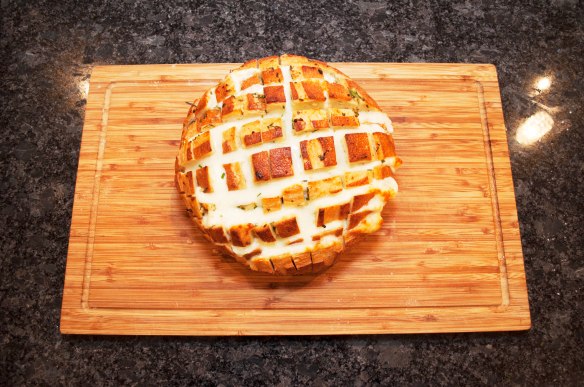
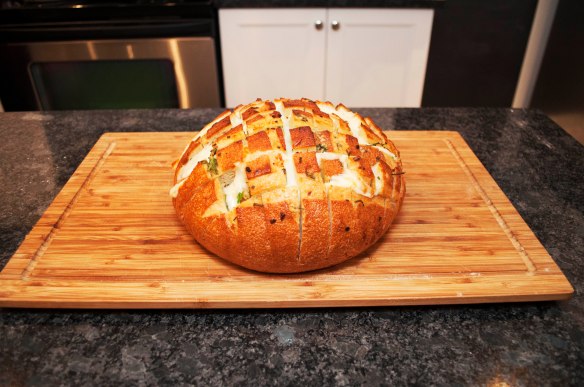
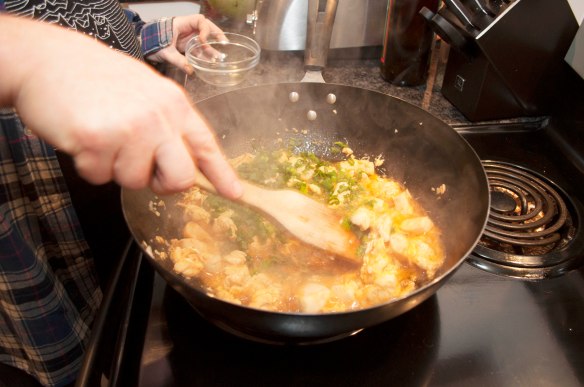
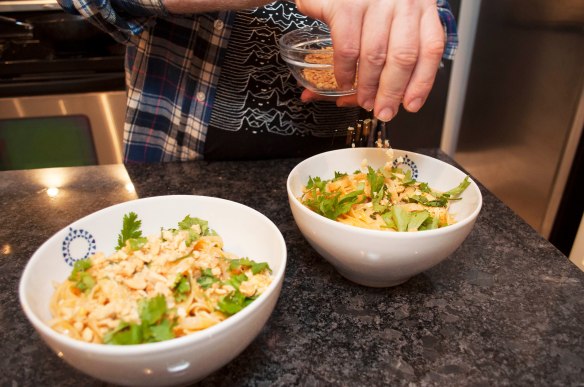
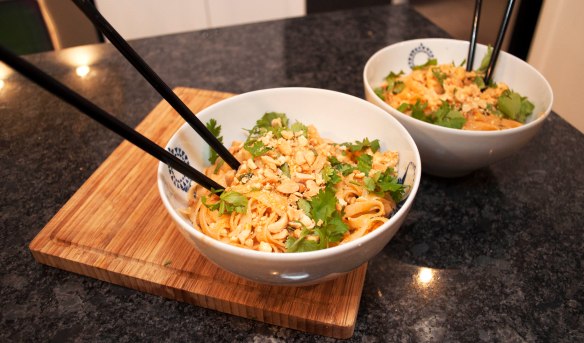
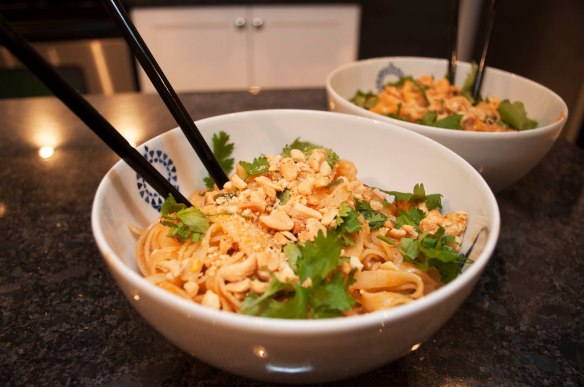
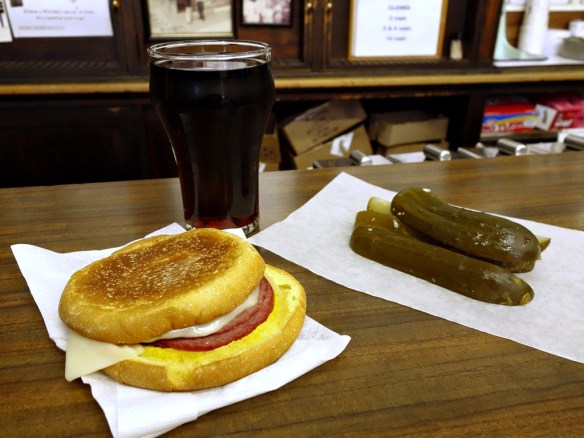
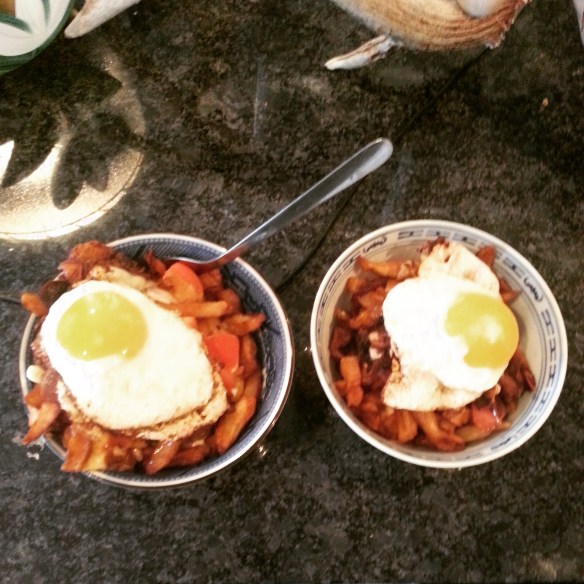
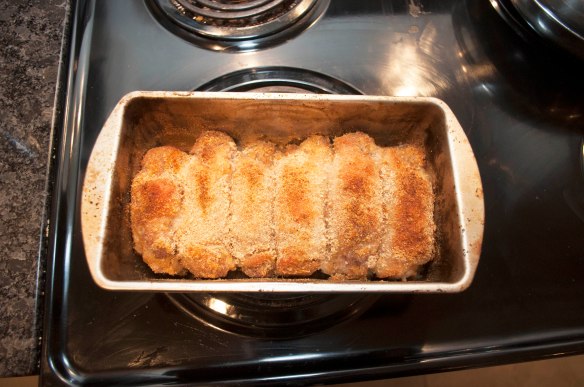
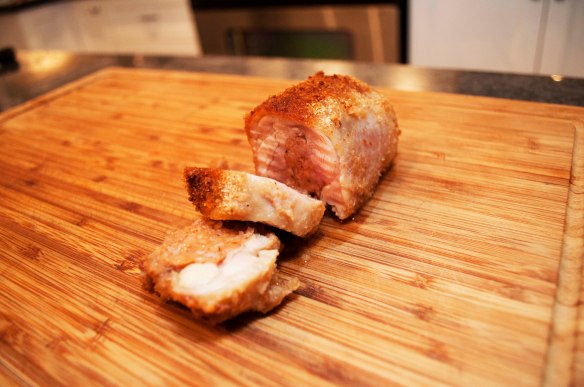
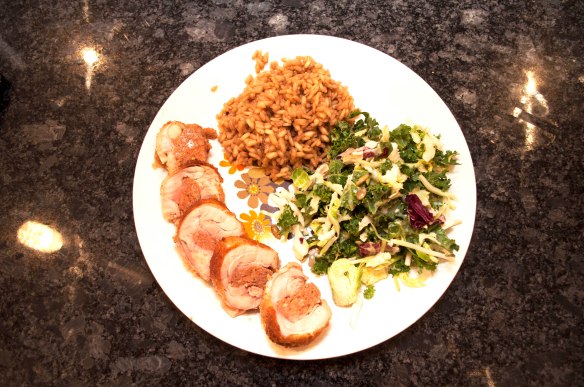
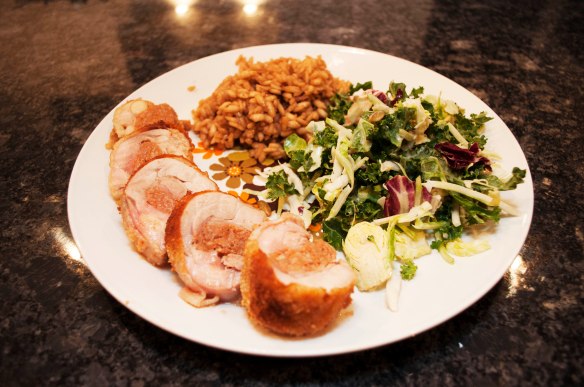
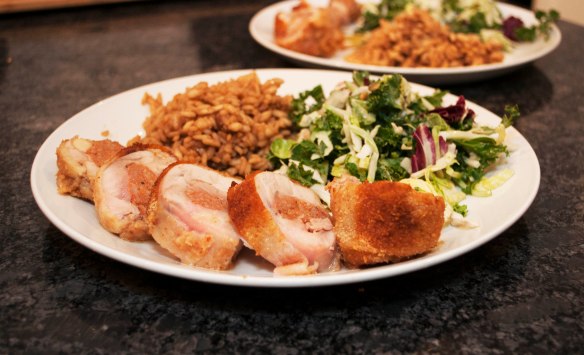
After much exploring, we found a wonderful little bar where our choices for food were lamb stew in a bread bowl … or not eating anything

Iceland_03

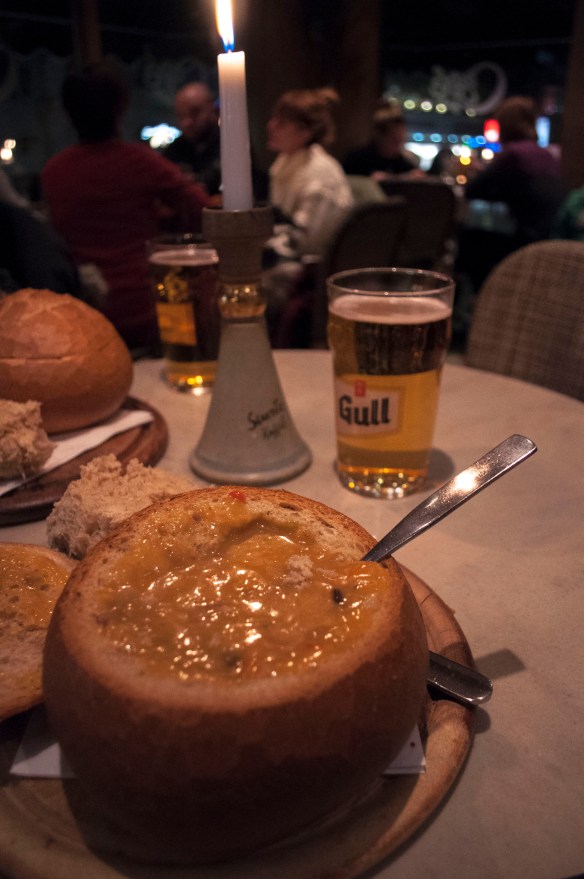
I think we made the right choice!

So, there’s a very brief recap of our introduction to Reykjavik and Iceland. Oh, we’re definitely going to go back!


Swedish Apple Cake (Äppelkaka)

appelkaka_169

Here’s a delicious cake that has no milk in it! A sweet, dense cake that is perfect with a cup of coffee. Served often drizzled in vanilla sauce.

If you’ve read this far, you probably want to try this. This recipe comes from Claire’s great aunt! Let’s see how it’s done.

appelkaka_001

You’ll need:

  • 250g all-purpose flour*
  • 150g icing sugar*
  • 3 eggs
  • 3-4 medium size apples
  • 150g butter* (+ a few little pieces for brushing on top)
  • 1 1/2 tsp baking powder
  • 1/4 tsp cinnamon
  • 3 tsp golden granulated or demarra-style sugar

*(you may notice our Swedish recipes are measured in weight instead of volume often … just how they do it)

g5-apple-slice

First you want to cut up the apples

Cut them into bite-sized cubes and put these aside for later.


g1-egg

Next we add the eggs to a mixing bowl

g2-icing-sugar

Add icing sugar

g3-mix-eggs

Mix this until whole mixture has turned white

appelkaka_044

Like this!

Add the flour, baking powder and a touch of the cinnamon to a sifter. Sift into a medium sized bowl

appelkaka_043

This should make sure the ingredients are well mixed

g6-add-flour

Add the flour to the large mixing bowl

g7-fold-in-flour

By hand, fold in the flour

Melt the 150g of butter in 240 ml of hot water

g9-mix-butter

While mixing, add the melted butter.

Grease a cast iron frying pan (or something similar).

g10-pour-batter

Pour the batter into the pan

appelkaka_099

Should fill it about half way

g11-add-apples

Drop the apples on top.

appelkaka_114

You want it nice and full!

g12-brush-butter

Brush the top with some melted butter

g13-add-cinnamon

Sprinkle on the cinnamon

g14-add-sugar

and the granulated golden sugar!

appelkaka_136

Ready to bake!

appelkaka_138

Bake in 350F oven for 40-50 minutes, until a knife stuck into the centre pulls out clean

appelkaka_142

Remove from the oven and let cool for 10 minutes

g15-loosen-cake

Run a knife around the edge

Flip the cake out onto a plate. Cover with a second plate, flip over. You should now have the cake sitting on a plate! Like a really lame magic trick!

g16-slice-cake

Cut the cake into wedges

Place onto plates

appelkaka_155

Time to add the vanilla sauce (if you want). This obviously can be made from scratch, but it also can easily be bought at your local IKEA … hey, we were there getting a shelf anyway!

appelkaka_171

Drizzle the vanilla sauce on top. Serve with a nice hot cup of coffee.

So there you have it, Swedish Apple Cake or Äppelkaka

appelkaka_170

Bon Apetit!


Stuffed Peppers & Cabbage Rolls (Dolmas)

dolmas_177

Thrown in to the general European mix of our families is Claire’s Armenian grandmother. She introduced Claire to an entirely different type of cooking, and through Claire I was then introduced to these foods!

Today we’re going to make her grandmother’s “go to” Armenian dish, Dolmas! These are peppers and cabbage rolls stuffed with meat and rice … so basically deliciousness in handy packages.

Ready to do this?

dolmas_001

You’ll need the following:

  • 1lb ground beef (or lamb) – we’re actually using a mix of both here
  • 4 large red peppers
  • 1 green cabbage
  • 1 cup chopped green onions
  • 1 bunch of parsley
  • 1 cup long grain rice
  • 1 large can of tomato juice
  • 1 clove of garlic (minced)
  • 1 tsp cumin
  • 1 tsp Arabic spice (white pepper, cardamom, nutmeg, allspice, black pepper, cinnamon, ginger & corriander) – we got this from Adonis market here in Montreal

dolmas_014

Start by chopping the parsley. Watch your fingers and don’t look in the camera!

dolmas_012

Okay, that’s better

g1-chop-parsley

Once you are done, get a large mixing bowl

g2-add-parsley

Add the parsley to the mixing bowl

dolmas_019

Add the meat

Add the rice, onions, garlic, cumin and spices

g6-mix

Mix all these ingredients well

dolmas_042

Should now look like this

dolmas_043

Place your cabbage in a large pot of water and let it boil … we’ll come back to it later


dolmas_045

Grab your peppers and cut off any long stems

dolmas_062

Which one has the ball? Guess for a dollar, win it all!

dolmas_046

You need to cut the caps off the peppers now

g7-cut-pepper

Using a small paring knife, cut on a 45 degree angle (so cap can be replaced and not fall in) all the way around the pepper

dolmas_052

Gently pull up to remove the cap

Cut away any excess on the bottom of the cap and clean out the inside of the pepper

Replace the cap and move on to the next pepper. Continue until they are all done

Grab some of the mixture and loosely fill the pepper. The rice in the mix will expand and if you have not left enough room, the pepper will rupture during cooking

dolmas_068

Repeat this process until all the peppers have been filled

g9-place-peppers

Now place your peppers in a pot just deep enough to make sure they are covered. (This pot is actually from Claire’s grandmother … we’ll give some more stories about it later!)

Time to make some cabbage rolls!

Go get that cabbage from the boiling water

dolmas_074

Cut carefully at the base of cabbage where the leaves attach so they can be removed from the core. Look at me! A face for radio!

g10-cabbage-peel

If the cabbage has boiled long enough the leaves should pull off with ease. Once they are no longer coming off easily return the cabbage to boiling water for a few minutes, then repeat the process. You’ll want to do this until you have about 10-12 leaves (or until the leaves have become very small)

dolmas_083

Take a large, intact leaf.

g11-leaf-cut

You’ll want to cut off the bottom about an inch up from where it attached to the core. Cut a straight line and be careful not to puncture the leaf anywhere else. You want these intact for rolling.

dolmas_091

Place mix near the bottom of the leaf. Leave a bit of room so you can fold the bottom over. Press the mixture into a log type shape and fold the bottom over. Fold in the sides of the leaf. Like the pepper, make sure not to pack the rolls too much, as the mix is going to expand and it may break the roll while cooking.

This should have created a little pocket with the mix inside. Now roll forward.

g12-roll

Make sure when it’s done to place the roll with the seam down so it doesn’t unravel

dolmas_101

Continue doing this until you have used all the mix.

g13-line-bottom

Take the remaining pieces you cut away to line the bottom of the pan. There should be some whole leaves still left over when you’re done

dolmas_107

Add your cabbage rolls. Make sure to have the seam on the bottom or it will unravel while cooking

dolmas_109

Place them rather tightly so they help each other say intact. Make a few layers if needed.

dolmas_110

Put in all the rolls except for the smallest one. This is going to be our ‘tester’!

Pour the can of juice evenly over the entire pot. Make sure to pour some inside each pepper so it wont get dry as it cooks. Add some lemon juice (you can also add some fresh mint at this point)

g15-add-water

Add water until the liquid is almost level with the bottoms of the pepper caps

dolmas_153

About this full

dolmas_126

Now slice any remaining cabbage leaves down the ‘spine’

Take the leaves and cover the entire pot

dolmas_137

Place that ‘tester’ roll in the middle and cover it with a couple remaining leaves. Place the pot on the stove top.

dolmas_139

Bring to a boil, then reduce to a simmer and cover. This is going to cook for about 45 minutes.

dolmas_141

This little dent in our lid is actually there on purpose. Claire’s grandfather did this to let the steam escape! This pot was actually one of the only pots they owned when they moved to Canada and were sent to work in Northern Ontario. They used it not only as a pot, but as a refrigerator by leaving it filled and placing it outside in the snow!

dolmas_143

Okay, it’s been 45 minutes … is it ready?

This is why we made a ‘tester’ roll!

dolmas_146

Peel back the top leaves to expose the ‘tester’

Remove the ‘tester’ and place it on a plate …

dolmas_151

It’s ready!

Now for garnish, we create what Claire and I lovingly call fancy sauce … it’s just sour cream with ketchup mixed in!

Put a pepper and couple of cabbage rolls on a plate. Don’t forget the fancy sauce!

dolmas_176

So there you have our Stuffed Peppers and Cabbage Rolls (Dolmas)

dolmas_170

Bon Apetit!


Chicken Pad Thai

padthai_154

A recipe that combines sweet, salty, sour and spicy, Pad Thai is a delicious Thai noodle dish that you will want daily!

Today we’re gonna make Chicken Pad Thai, but you can substitute shrimp or beef or tofu … so make it how you want! Same goes for how spicy you like it. Always feel free to add more or less chili sauce so it’s the way you want it to be.

Okay, let’s see how this is done!

padthai_004

For this dish, you’ll need:

  • 1 lb chicken breast, boneless & skinless
  • 1 cup chopped green onion
  • 1 pkg (454 ml) dry rice noodles
  • 1 cup chopped cilantro
  • 3 tbsp brown sugar
  • 2 tbsp chili sauce
  • 75 ml fish sauce
  • 1 egg
  • 1 clove minced garlic
  • 2 limes (or equivalent amount of juice)
  • 1 cup crushed peanuts (approx.)

padthai_005

First step is to soak the rice noodles in warm water. We don’t cook them for this! Make sure your bowl is big enough … this one wasn’t

padthai_006

Okay, this one will work!

Pour water to cover and let them soak for about half an hour, until they are soft

padthai_011

Disaster averted, let’s make our sauce!

g1 sugar

Pour sugar in a medium size mixing bowl

g2-chili-sauce

Add your chili sauce (you can find this in the grocery where Asian foods are)

g3-fish-sauce

Add the fish sauce (also at the grocery, right near the chili sauce usually). Do you smell that pungent fish sauce? I’m sure you recognize that smell from going to Thai restaurants!

padthai_024

Add 125 ml of water to this mixture

g5-juice1

Squeeze in that fresh lime

g6-juice2

Two limes should be enough!

g4-stir1

Now stir it all together and put aside

g7-chop-chicken

Cut the chicken into bite-sized pieces. Do you still have all your fingertips? If you answered yes, move on to the next step!

g8-oil

Add vegetable oil to a wok (or large skillet) and put the heat at medium-high

Add garlic and chicken to the heated oil

Stir fry until chicken is no longer pink

g12-add-sauce

Add the sauce and let it boil for a few minutes

Get an egg and lightly beat in a small dish

g14-add-egg

Add the egg

g15-stir-egg

Stir until sauce starts to thicken

Add onion and cilantro

padthai_119

Mix well

Now, go get drain those noodles and bring them over!

g18-add-noodles

Add the noodles to the wok

padthai_132

and mix it all together

padthai_137

This looks pretty good!

padthai_138

just a little bit more …

padthai_140

Place into bowls and top with some fresh cilantro sprigs and chopped peanuts

padthai_144

Add as much as you like!

padthai_153


There you have it, sweet and spicy Chicken Pad Thai ready to eat!

padthai_149


Bon Apetit!

French Canadian Sugar Pie (Tarte au sucre)

sugarpie_086

Moving to Montreal has given us exposure to an entirely new culture and new traditions. One classic Québec dish is Tarte au sucre or Sugar Pie. 

With a crunchy top and sweet, creamy middle, French Canadian Sugar Pie (Tarte au sucre) is a dessert that you’ll quickly want to add to any meal when guests are over. Heck, you’ll just want it anytime you can get it!

I’m pretty sure by this point, you want to try this …

sugarpie_001

Here’s what you’ll need:

  • 2 cups brown sugar (packed)
  • 2 eggs
  • 3 tbsp all-purpose flour
  • 1 can evaporated milk
  • 1 tsp vanilla
  • 3 tbsp butter (approximately)

You will also need a pie crust to put this in. I just opt for a store bought, frozen pie crust (get the deep dish), but if you are adventurous and have time, you can always make your own from scratch!

g1-add-flour

Add the flour to the sugar

g2-mix1

Mix until fully blended

sugarpie_013

Like so! Try to break up as many little clumps of sugar as you can.

Put this aside for later

Add the eggs to a mixing bowl

g4-add-milk

Pour in the can of evaporated milk

sugarpie_023

Isn’t this easy so far?

Add the vanilla and whisk until all is fully blended

g7-add-sugar

Add a little of the dry mix and whisk it in.  Doing it a little at a time makes it easier to blend.

g7-mix3

Mix until smooth

sugarpie_046

Should look pretty much like this.

At this point, you’re probably thinking you forgot to add the butter … you haven’t, it’s used later!

g9-pour-filling

Pour this mixture into a deep dish pie crust

sugarpie_057

Should pretty much fill it perfectly

Now, remember that butter I said we’d use?

Take the butter and cut it into small cubes

You want to take the pieces of butter and place them evenly all over the top of the pie

sugarpie_072

The butter, when it melts and mixes with the sugar, will bake into a crunchy top, almost like a crème brûlée.

sugarpie_074

Place in a 350F oven for approximately 40 minutes, or until the edges are firm but the centre still has a jelly like wiggle.

sugarpie_076

Wow, this smells so good!

You can also pour the mixture into small tart shells if you are taking a dessert to a party or want to make points with your co-workers! The small tarts will cook faster, so expect them to be ready in closer to 20 minutes.

Let this cool and place in the refrigerator (or more traditionally here, outside in the snow!)

sugarpie_084

There you have it, lovely Tarte au sucre or Sugar Pie

sugarpie_087

Bon Apetit!


Bienvenue à Montréal / Welcome to Montreal

mtlcity

It has now been six months since we packed up our lives in Toronto and moved to Montreal.

Now, for all of you who aren’t so familiar with the distances, it’s about 540km,

montreal-toronto

The trip takes about 6 hours by car, if you make a couple of pit stops and the traffic is light. Might not sound too bad, but if you do this trip with a dog and cat, well … it feels like quite a bit longer!

When people think of Montreal, they think winter. Winter is absolutely a huge part of the identity of the city. We moved in mid-July, on the hottest day of the year, with temperature getting up to near 40C. My first impressions of Montreal were not of a cold, snowy place!

20150713_193829

Just watching the movers carry furniture up those stairs in that heat … they were gonna get a good tip!

Here’s a quick little tip for surviving the heat in Montreal if you don’t have air conditioning … on every corner there is a dépanneur (corner store). Just about every one of them has a walk in beer fridge. When you get too hot, go shopping for beer. Walk around until you are cooled off. You don’t need to buy beer every time … you may want to, but if you’re going there once an hour to cool off, probably isn’t the best idea!

Just for fun, let’s look at this same street, same view on Dec 29th …

20151229_154400

People in Montreal can talk about the weather forever, so let’s just come to the mutual understanding that the weather here can be extreme and move on to my favourite topic here, the FOOD!

Okay, it’s breakfast time, which here in Montreal can mean only on thing …

IMG_20160118_080426

Montreal bagel with cream cheese and smoked salmon. (If you live in the west part of the island, you oddly pronounce the ‘l’ in salmon … just a thing I noticed.)

Want a big debate here? Ask someone where to get the best bagels! Myself, I go weekly to pick up piping hot bagels from Fairmount Bagel. How much do I like them compared to anyone else?

20160113_144024

I trek out in -25C weather to get my bagels!

The other bakery you’ll hear mentioned all the time is St. Viateur Bagel, just down the street from Fairmount. Both bagels are pretty fantastic, but I have my favourite. Also, if you go to Fairmount, you can drop in to the famous Wilensky’s next door for a special. 

wilenskyspecial

It’s a  grilled beef baloney sandwich. It can be ordered with cheese or without … that’s really the only choice you get. Get a side of pickles and a cherry coke (or my favourite, a vanilla egg creme). This is a Montreal classic!

Wait a minute … what about poutine?  I hope that by now, you all know me better than to think I was going to miss poutine!

Here in Montreal, I’d classify poutine into two categories:

20150723_184504

Classic Poutine – This is your basic fries, cheese curds and gravy. It’s best if bought at a greasy spoon (or as one native of Montreal put it, a dirty place), or off a food truck! This wonderful mess you see above is from my favourite classic poutine joint Poutine Lafleur right near us in Verdun. It’s done right, where the container is half filled with fries, then covered in gravy, then more fries, then more gravy … then cheese curds completely smother the top … and then MORE GRAVY!

Have it with a beer … it’s not like this is gonna be healthy anyway!

labanquise

Fancy Poutine – This is the poutine you get where you have many, many choices of toppings. Above some classics from our favourite fancy poutine place, La Banquise! Chicken and peas, or sour cream, guacamole and tomatoes, or bacon and hot dogs … yea, the combinations are fantastic. Claire still talks about the time she got their special Christmas dinner poutine, with tourtière filling, chicken and cranberry sauce on top!

Poutine is also the go to food if you’re heading home from the bar and possibly had a few too many … point of note, if you can’t finish your poutine, you can take it home and heat it up tomorrow

IMG_20151107_113146

Montreal post party night hangover magic … add a fried egg to your poutine you couldn’t eat last night! Hey, I’m not a proud man …

For some more quintessential Montreal, we have to go to a Habs game!

20160106_192317

For any of you who aren’t familiar the Habs is the nickname of Montreal’s legendary NHL team, the Montreal Canadiens

A little background here. The Canadiens have the most wins, most Stanley Cup championships and are the oldest team in the NHL (dating back to 1909, well before the NHL existed). The love for them here in Montreal is unchallenged.

Okay, now you’re starting to fit in (other than your terrible French … or maybe that is actually making you fit in even more!)

Montreal is very much about enjoying the winter.

At Parc Jean Drapeau , you can attend the  Fête des neigesa winter carnival that happens for four weekends starting in mid-January

fnmitchandclaire

A ferris wheel? A zip line? Tube slide? Wait, is that maple taffy?!

taffy

This wonderful magic is maple taffy, created by pouring hot maple syrup into the snow and letting it cool for about 30 seconds, then you take a stick and roll up the maple taffy!

You know I’m gonna do this …

fnmapletaffy

Pretty sure I could feel exactly where my pancreas was located in my body after eating one maple taffy stick … but worth it!

Now, I’ve just touched the surface of life here in Montreal

The photos above are just a preview of things to come, stories to tell

Hope you’ll join us on our journey!


Italian Sausage Stuffed Chicken with Wild Mushroom Risotto

wm risoto chick_127

It’s been a few days since we put something up for you. Since you’ve been so wonderful and patient, we’re going to reward you with two recipes today!

This is a dish that my wife nicknamed “chicken grenades”. They’re chicken thighs stuffed with Italian sausage and they’re delicious!

I’ll also be showing you an easy method for making a lovely wild mushroom risotto

So, get the chicken prepared and cooking and then you can do the risotto while it cooks!

Italian Sausage Stuffed Chicken

wm risoto chick_005

Here’s all you’ll need:

  • 6 chicken thighs (skin on)
  • 3 Italian sausage (hot or mild, your choice!)
  • 1 cup breadcrumbs
  • 1 tbsp seasoned salt

wm risoto chick_014

First thing we need to do is remove the bone from the chicken. I like using a small paring knife for this just because I find  it’s much better to handle the delicate job.

No special trick here, just cut along the bone and separate it from the chicken without cutting through the chicken … or your fingers

wm risoto chick_020

Six boneless chicken thighs, five fingers … yea, I’m good

g2-slice-sausage

Take a sausage and slice open the casing

wm risoto chick_030

Now remove from the casing

Cut the sausage into a piece about the size of the chicken thigh. Place on a piece of chicken, skin side down, and then roll the chicken around the sausage

Repeat until all the thighs are stuffed

For the coating, pour breadcrumbs into a bowl.  Next, add the seasoned salt and mix it all together

g6-coat

Take a stuffed chicken thigh and roll it in the breadcrumb mixture. Place it in an oven safe pan. I like to use a loaf pan because I can pack the chicken in tightly enough that it won’t unravel while cooking!

Repeat until they’re all done

wm risoto chick_063

Place them in a 400F oven for approximately 40 minutes. When packed together like this, the chicken in the centre takes a bit longer to cook.

While this is cooking, let’s make that risotto!

Wild Mushroom Risotto

wm risoto chick_004

For this, you’ll need:

  • 1 cup arborio rice
  • 1L (approximately) of chicken stock
  • 1 cup of wild mushroom (I am using dehydrated mushrooms)
  • 1 cup grated Parmesan cheese

If using dehydrated mushrooms, you’ll need to re-hydrate them for 30 mintues, so this should be done before ANYTHING else is started

g1-pour-water

Add warm water to the mushrooms. I’m using dehydrated mushrooms as I didn’t have a good source for fresh wild mushrooms at this time of year. Dehydrated will also give you a wonderful mushroom broth to add (as you’ll see)

wm risoto chick_013

Let this stand for 30 minutes

g7-pour-rice

Add the rice to a hot skillet. Only the rice, no oil … we’re gonna toast the grains a bit

wm risoto chick_073

Stir over a medium heat

Keep going for 4-5 minutes, or until the rice is starting to get a bit golden

g9-add-stock

Add about half a cup of the chicken stock. We’ll be adding it slowly and mixing it in.

g10-steam-stir

Stir through that steam!

Now add the mushrooms and stir. Pour in that wonderful mushroom broth too!

wm risoto chick_101

You want to continue a process of stirring and adding broth every time the broth you have added is absorbed.

wm risoto chick_112

Your risotto should start to get a creamy texture. You want to keep going until the rice is cooked but not quite fully soft. (It’s okay to have a spoon to keep tasting!)

g13-add-cheese

Just as it’s almost ready, add the cheese

wm risoto chick_107

Mix this in and remove it from the heat … it’s done!

Okay, better go check on that chicken

wm risoto chick_113

Perfect!

g15-slice

Take a piece of chicken and place it on a cutting board. Slice into bite-sized rounds

wm risoto chick_122

Yea, this is SO good …

wm risoto chick_125

Place it on a plate with some of the risotto and a nice green salad

wm risoto chick_124

Looks fancy!


wm risoto chick_126

So there you have it, Italian Sausage Stuffed Chicken with Wild Mushroom Risotto

wm risoto chick_129

Bon Apetit!